Once you have uploaded a patient's pathology report to their patient record you will be able to use Lumielle, our SimpleClinic AI assistant, to read the document, extract the test results and record them directly into the patient record saving you hours of your valuable time on data entry.
On this page:
- Helpful Links
- Upload the patient file
- Record and view the patient pathology results
- Print Test summary
Helpful Links
- How to upload patient files
- To manually record patient pathology results see here
- Customise your default tests and pathology reference ranges
Upload the patient file
Step 1. First you will need to upload the patients pathology report to the patient record, click here for these steps.
Note:
- Lumielle can analyse previous files already saved to the patient record.
- Lumielle CANNOT analyse a password protected pdf file.
Record and view the patient pathology results
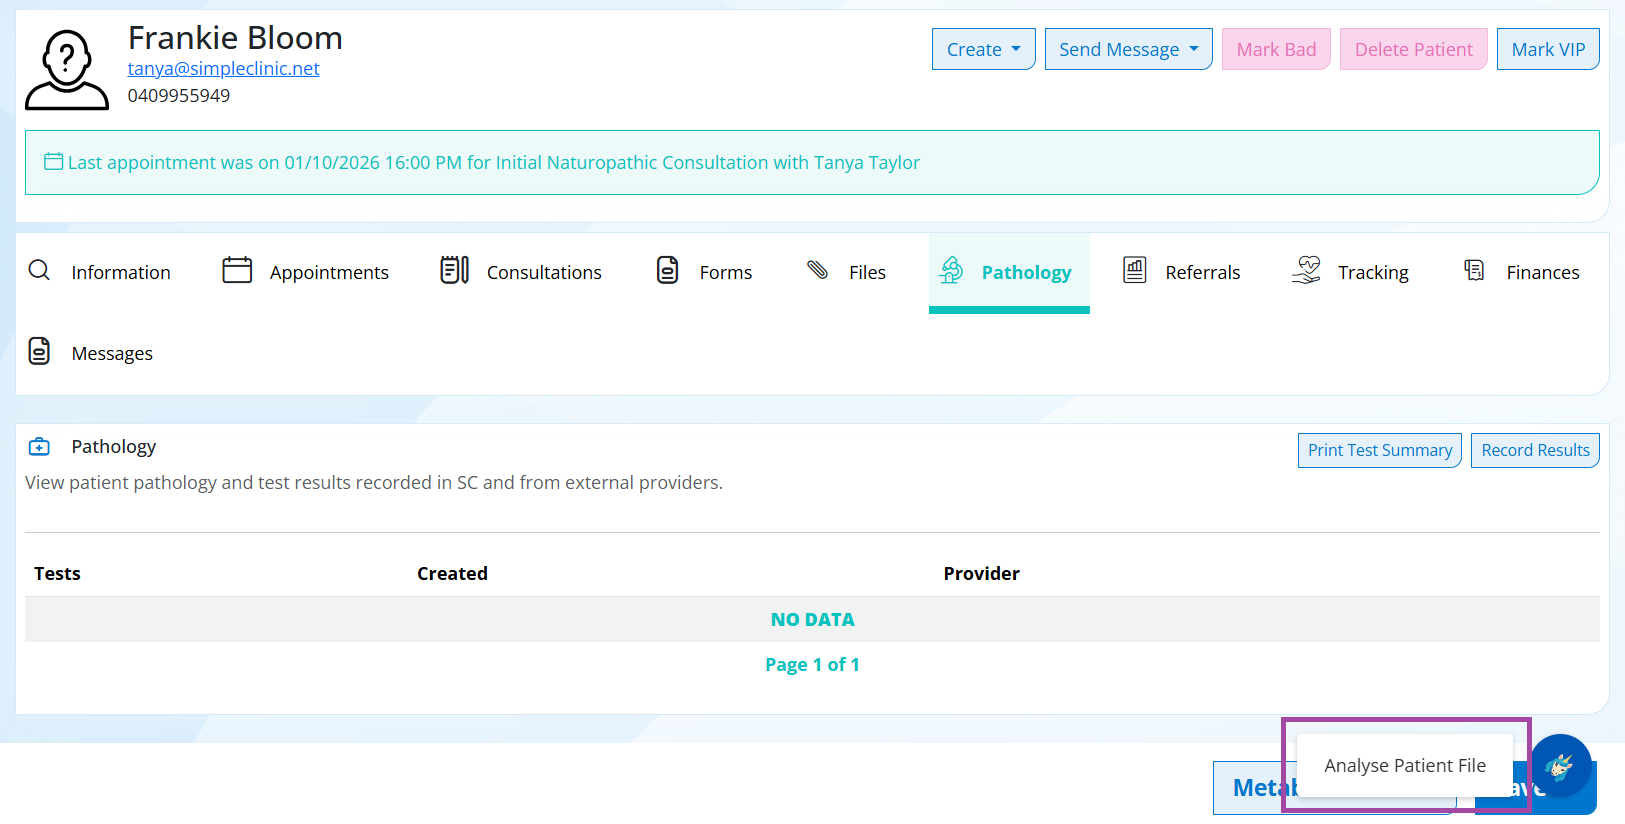
Step 2. Once the patients pathology is saved under the patient files tab -> Go to the Patient Pathology tab -> Select the Lumielle icon at the bottom right hand corner of the Patient record -> Click Analyse Patient File.
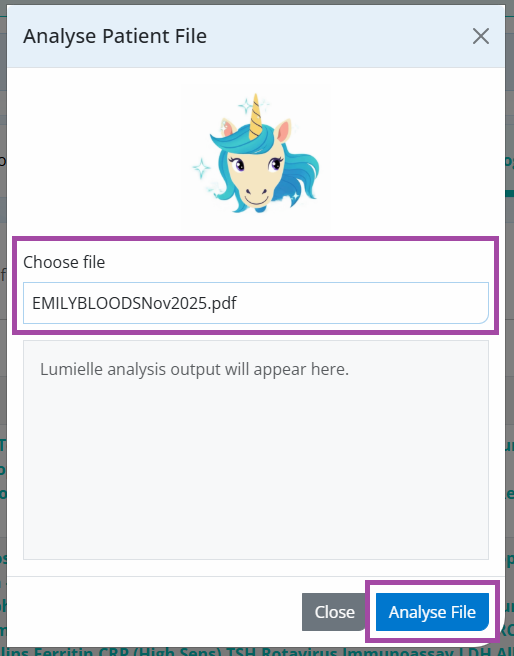
Step 3.
Select the correct File in the Choose File Field (this is selecting from the files uploaded in the patient files tab) -> click Analyse File.
Lumielle will read and record the most recent test result from the pathology report.
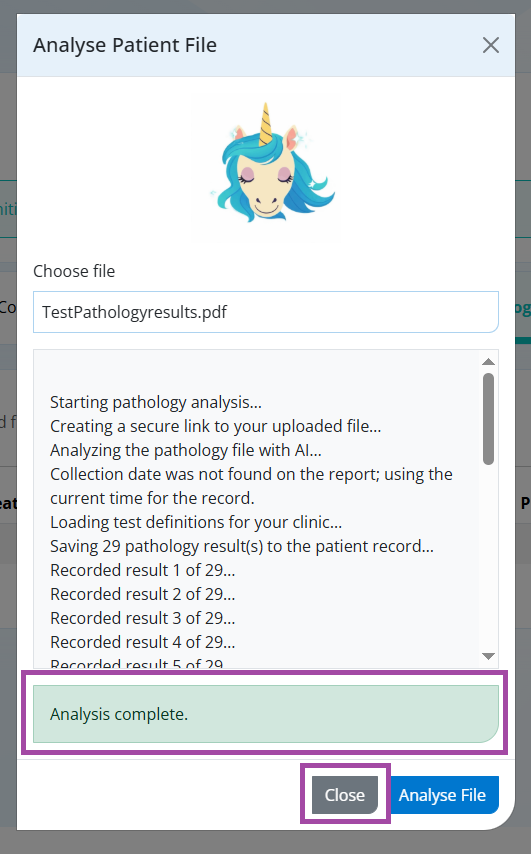
Step 3. Once you can see 'Analysis complete' -> Click Close.
Step 4. The following menu options are available:
Created: Will show the date the pathology test was completed
Provider: SC will be the provider when results have been uploaded manually. i-screen will be the provider if the results are from your i-screen integration. Click here for more on i-screen referrals.
Delete Batch: This will delete the pathology results from the patient record. Note: This is NOT recoverable.
View: Select View to see the most recent test results on the pathology report.
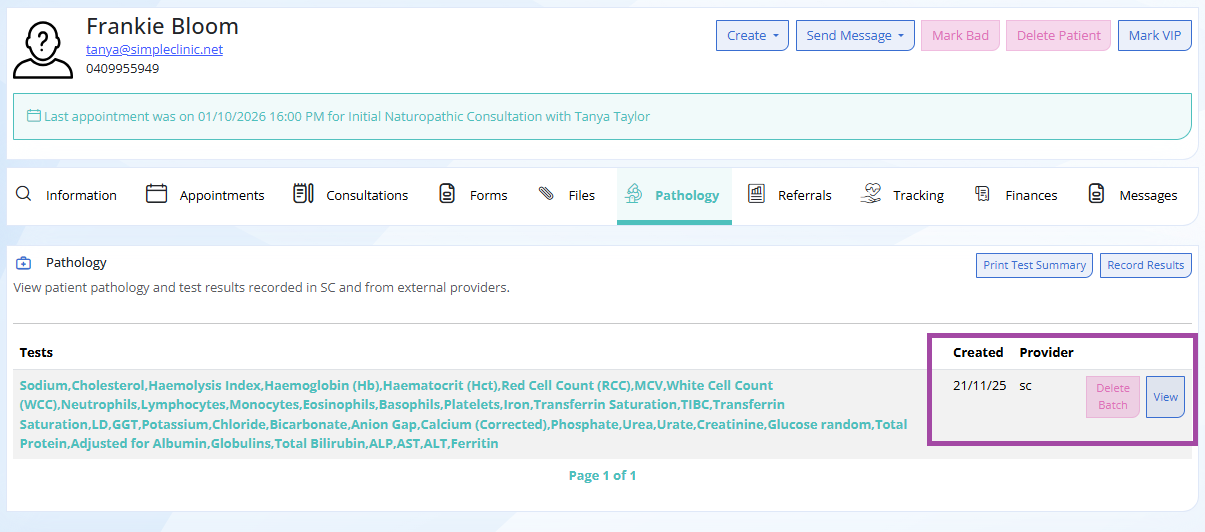
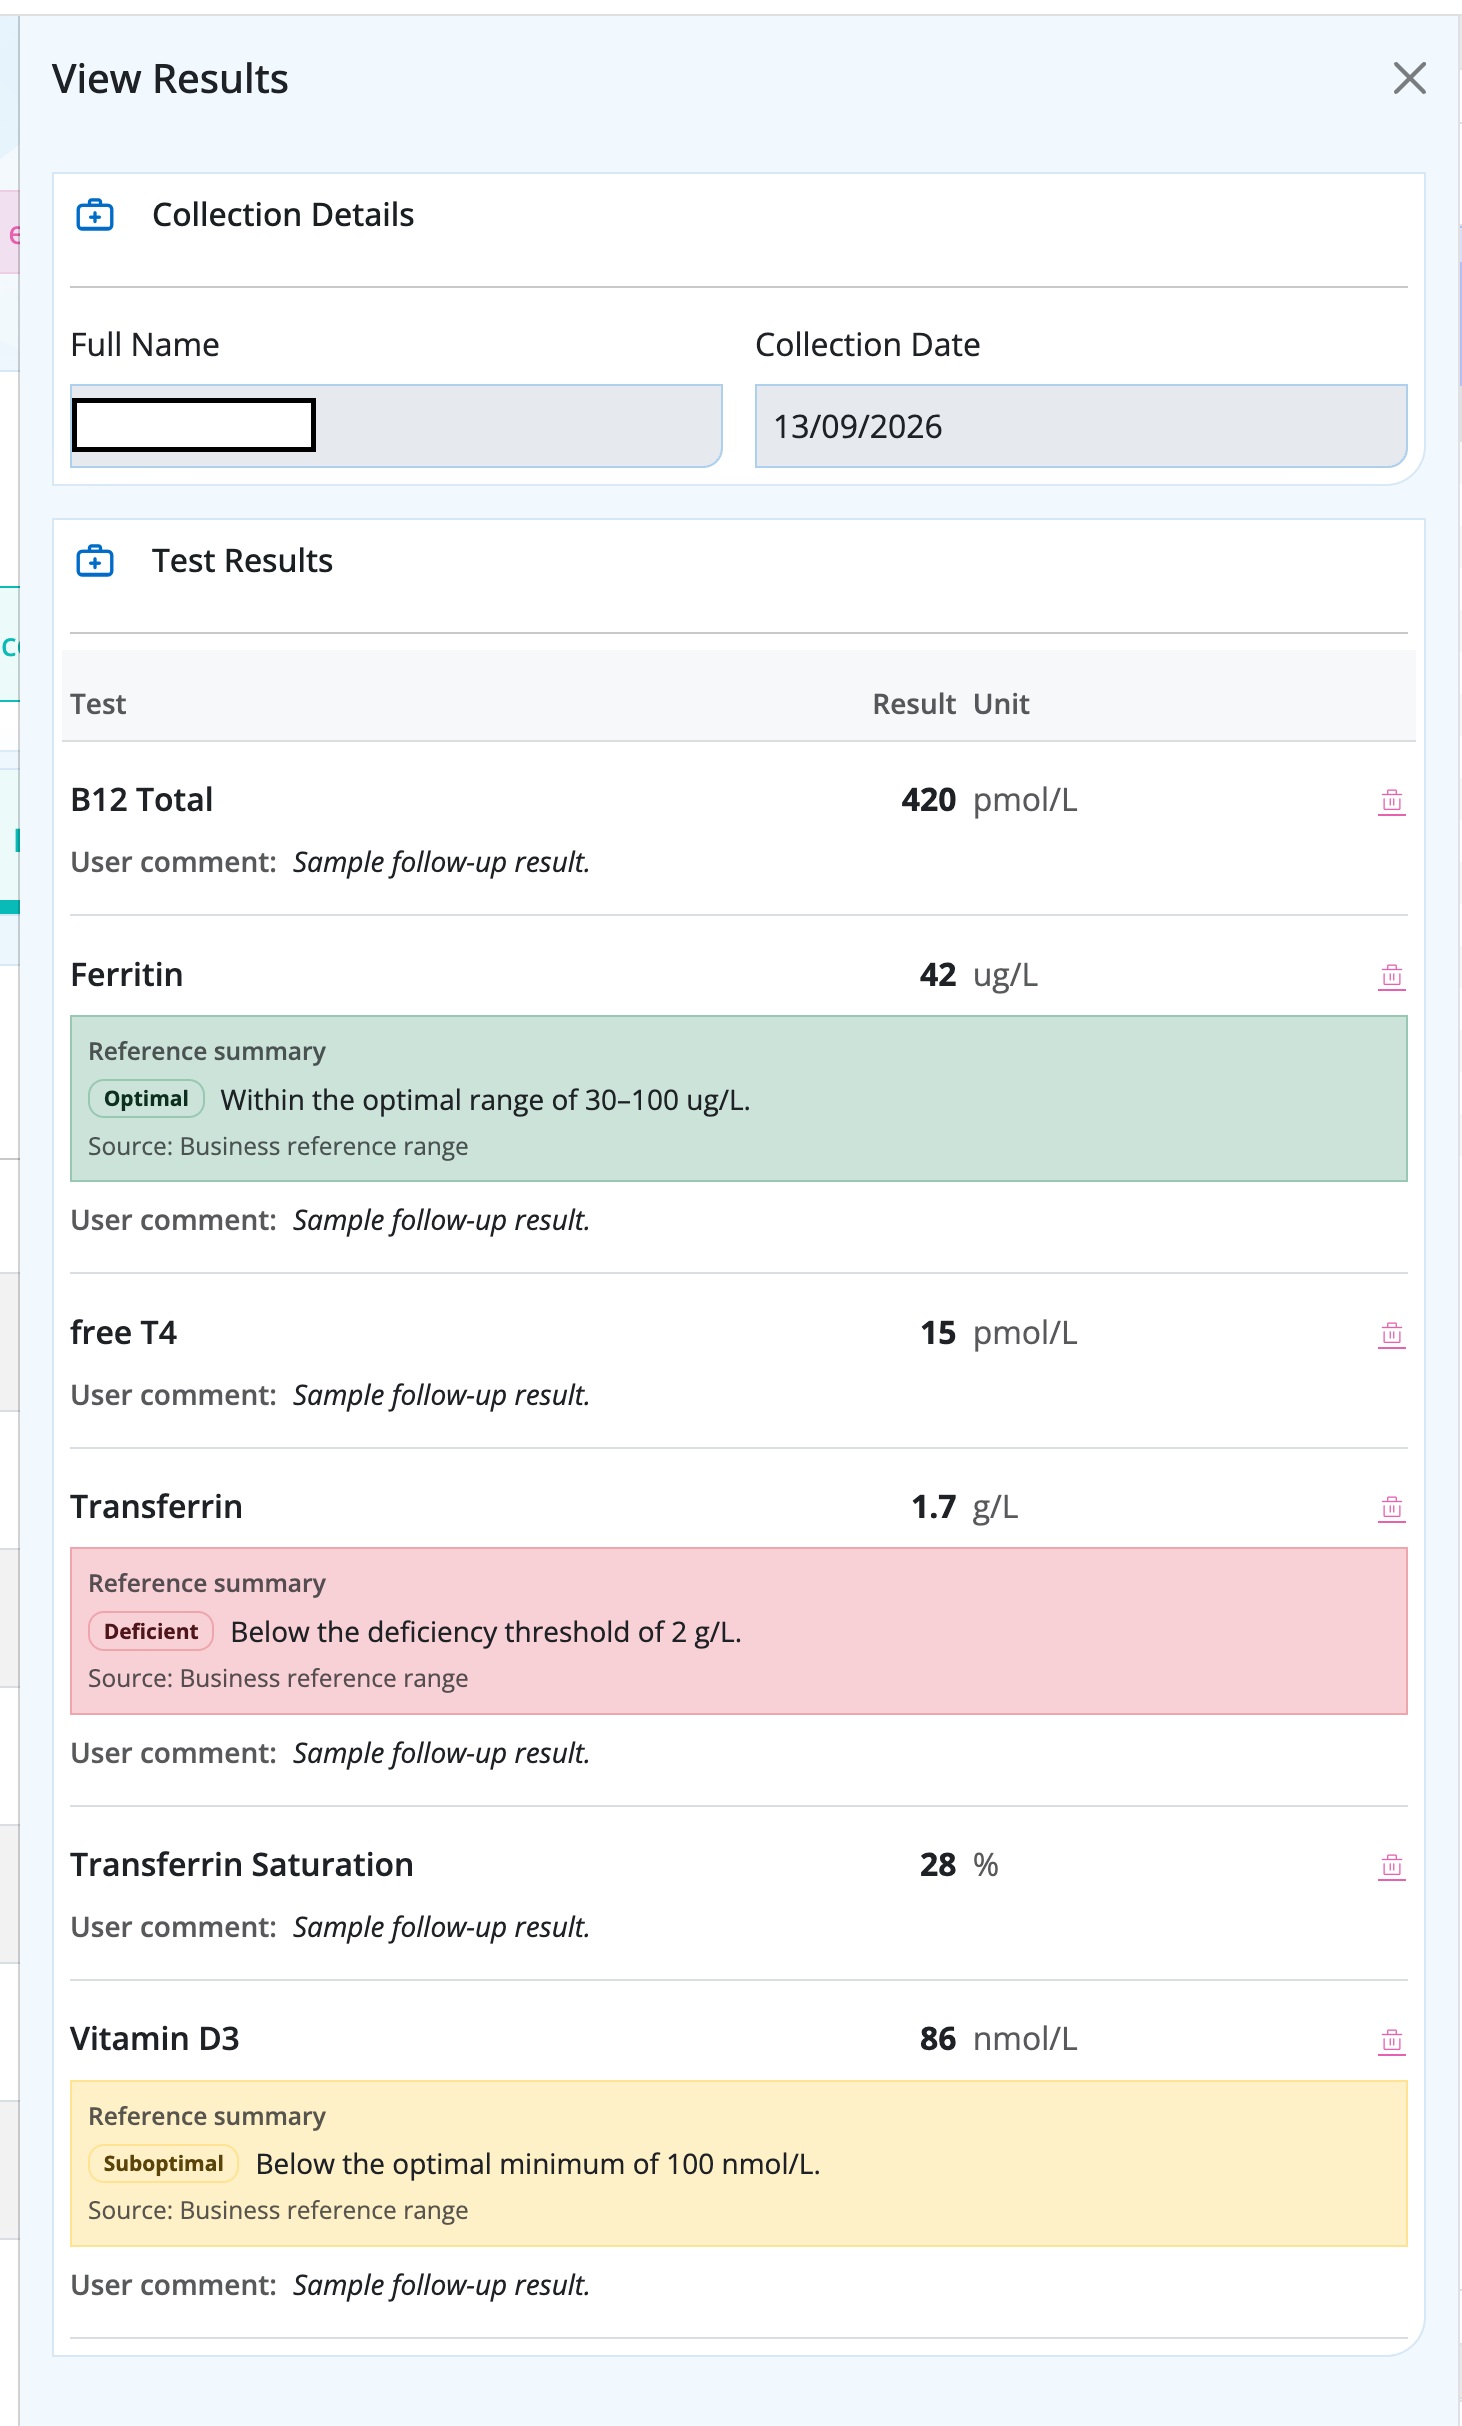
Step 5. Select View -> results will be displayed in the following order settings:
- The order # set under Pathology (Ascending) -> Tests. See this article for more on this setting.
- The test name (Ascending)
You can delete individual test results from a batch using the delete icon from the right hand side panel. Note: This result will NOT be recoverable.
Your patients results will interpreted as optimal, suboptimal, elevated or deficient based on either the pathology lab reference ranges, or your own customised reference ranges if applied.
You can update your own preferred reference ranges under Pathology -> Tests. Please refer to this article to customise your test settings.
Print a Test Summary report
Step 6. To Print a Test Summary of the patient's pathology select -> Print Test summary.
The Test summary will display and compare the last 8 batches of results which have been entered.
To edit the order of the results on the Test Summary Page, refer to this article.
Note: Lumielle AI is only used to record and analyse the pathology in steps 1-4 above. The test summary and setting your custom reference ranges are part of the core module whether you use Lumielle or not.
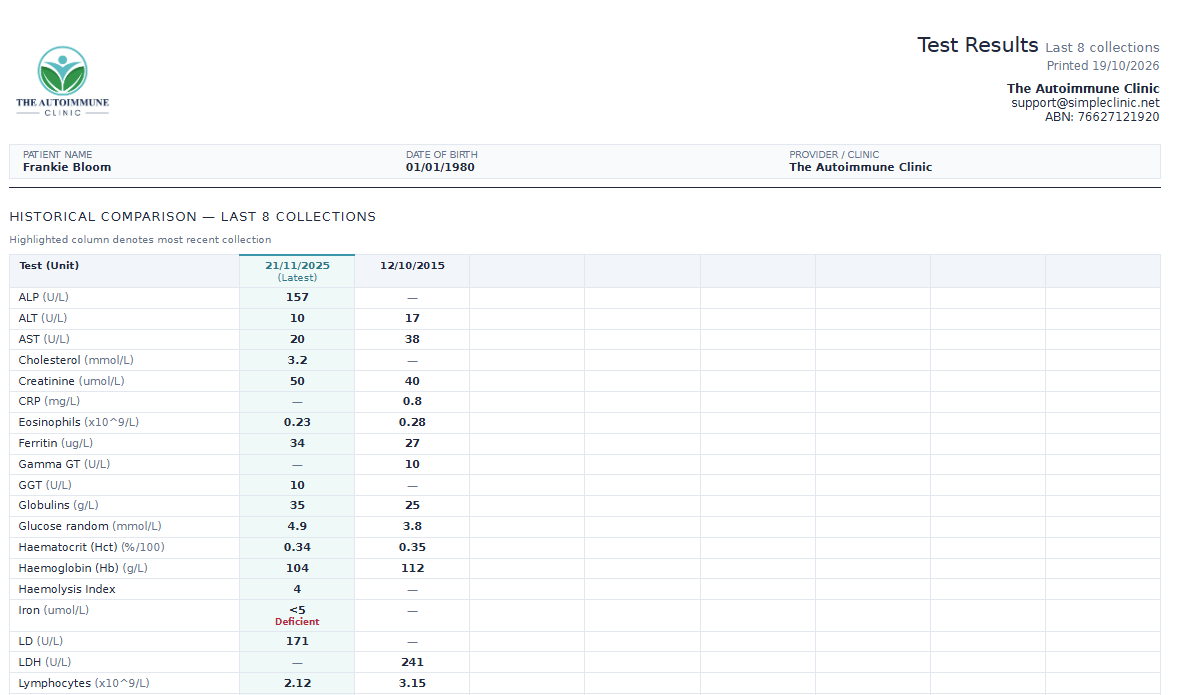
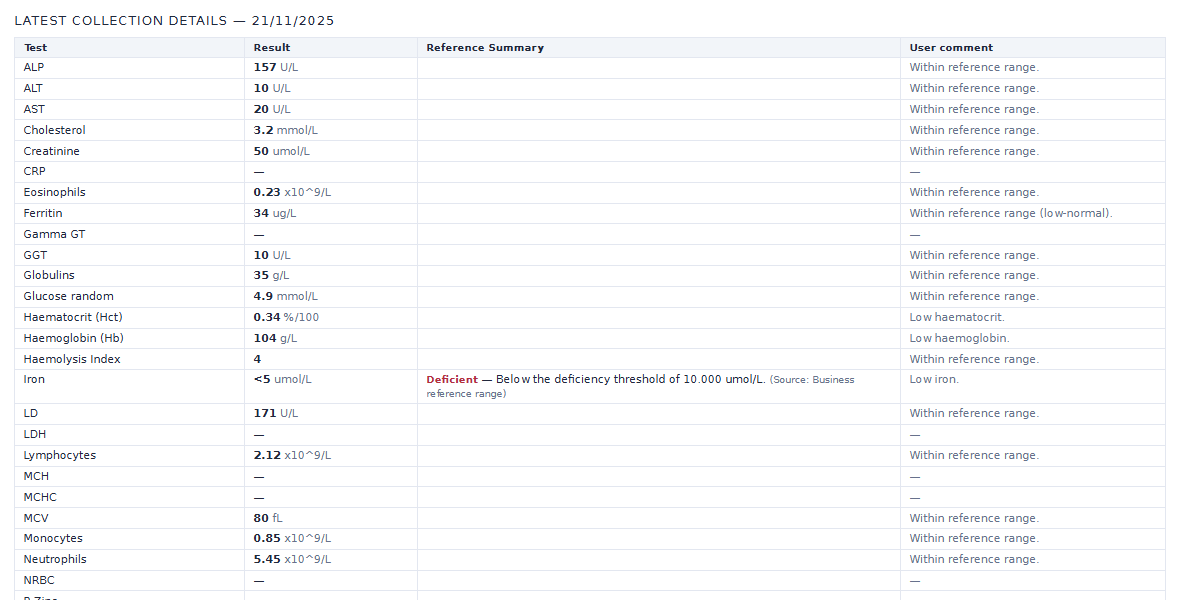
A more detailed summary of the latest result will be at the bottom of the report, followed by Historical collection data.
To only print the comparison collection (last 8 collections), and not the latest collection details or historical collection details, select Control + p -> print the report to a pdf -> select the pages required -> upload the file to the patient record files tab. Share the document securely via the patient portal or patient prescription.
Test: The name of the test as reported on the patients pathology
Result: The result from the pathology report
Reference Summary: If you have set your own custom reference ranges, it will indicated if the result is Deficient, Optimal or Elevated, in relation to your set parameters. To set your own reference ranges refer to this article.
User Comment: Lumielle will comment on the results based on the pathology reference ranges:
- Lower than the reference range
- Within reference range
- High compared with reference range
- Reported negative
- Reported positive