Please read this article carefully to understand how to Connect and configure your Xero integration with SimpleClinic.
On this page:
- Important Information
- Helpful Links
- Linking SimpleClinic and Xero
- Configure Xero accounts
Important Information
- If connecting to Xero we recommend you consult with a Xero certified accountant.
Helpful Links
- Getting started with Xero
- Reconciling in Xero using a Settlement Account
- Reconcile in Xero by matching invoices
Linking SimpleClinic & Xero
Step 1: Go to Business Setup -> Integrations
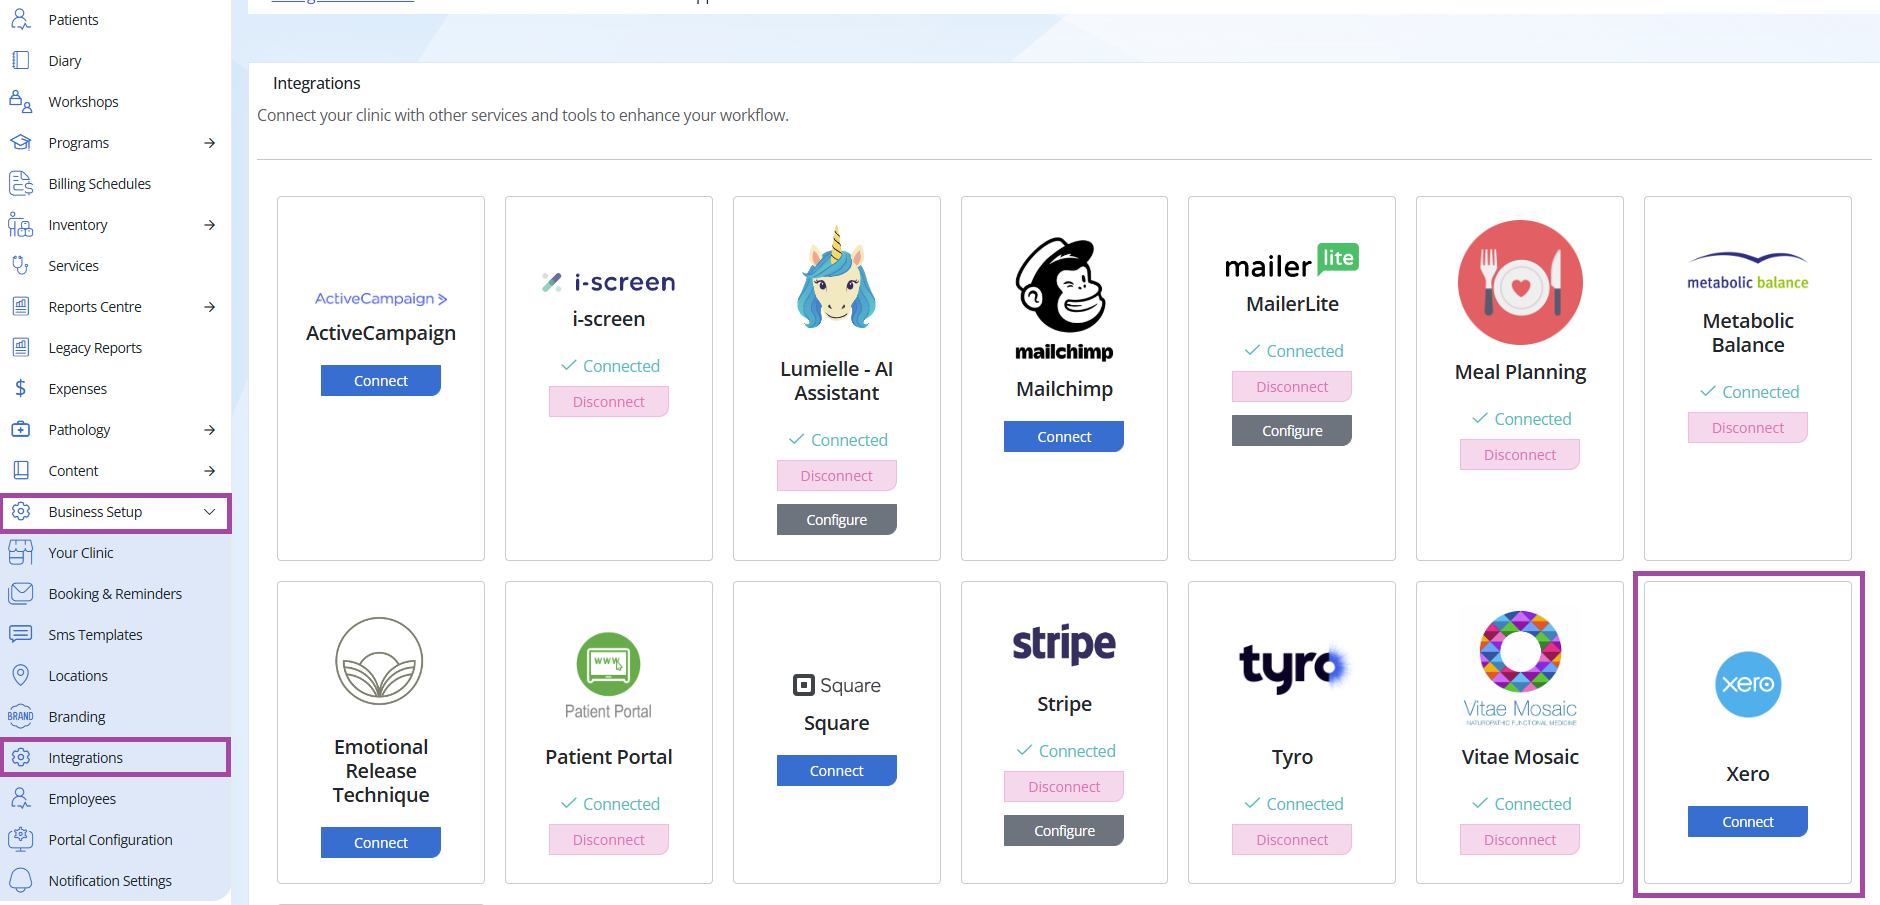
Step 1.
Click the Connect button on the Xero Integration tile.
You will be directed to Xero to login and provide permission for SimpleClinic to utilise your Xero account.
Once you are logged in from the list of organisations choose the relevant organisation. Do not connect to a Demo organisation as this is NOT supported in the integration.
Changing the organisation later may require you to reconfigure the integration.

After choosing the organisation you will be returned to the SimpleClinic page where you can configure the integration.
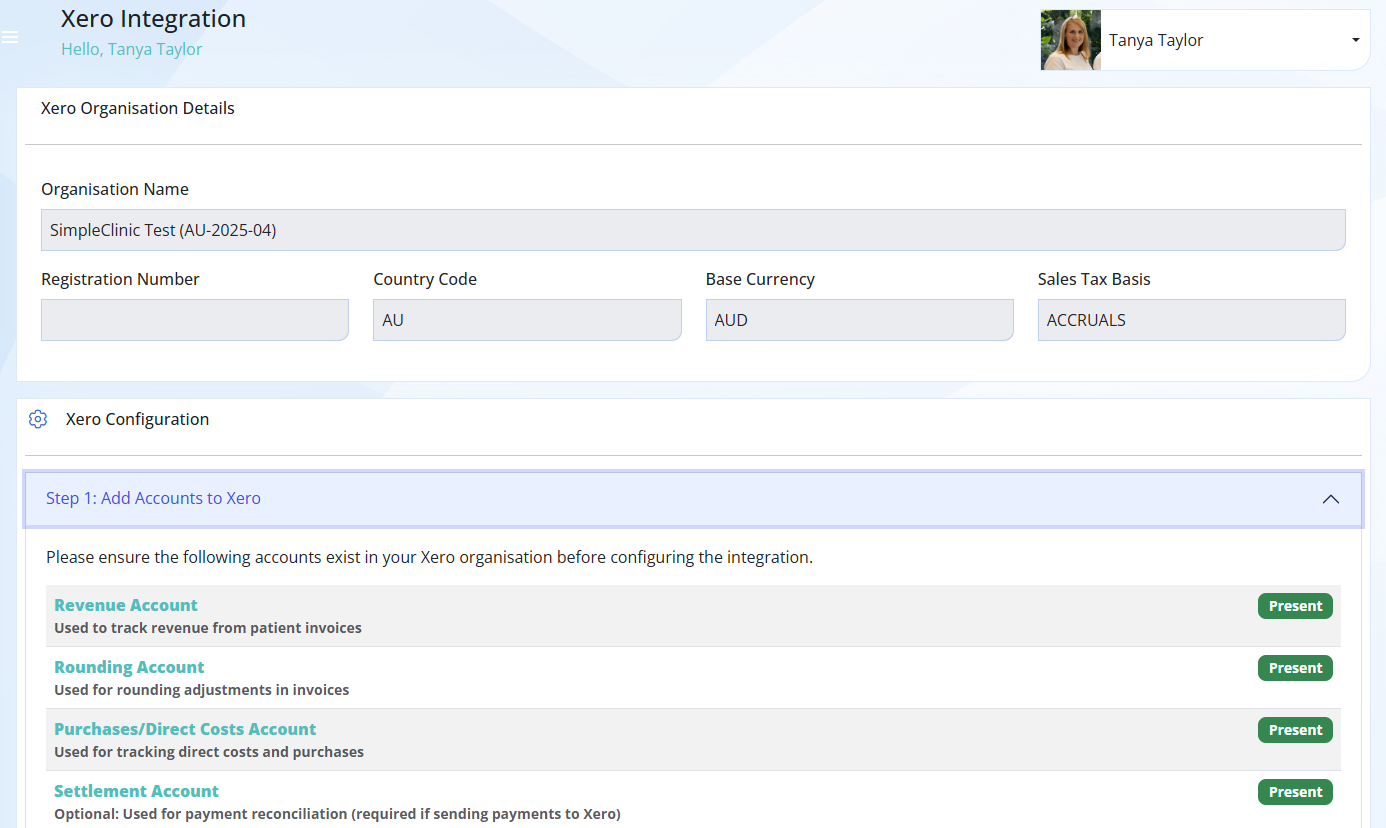
The top section of the page is read only and contains information about the Xero organisation you are linked to.
This will be based on the organisation you chose when you initially logged into Xero. If information is missing, this is because the information is NOT in your Xero account.
Configure Xero Accounts
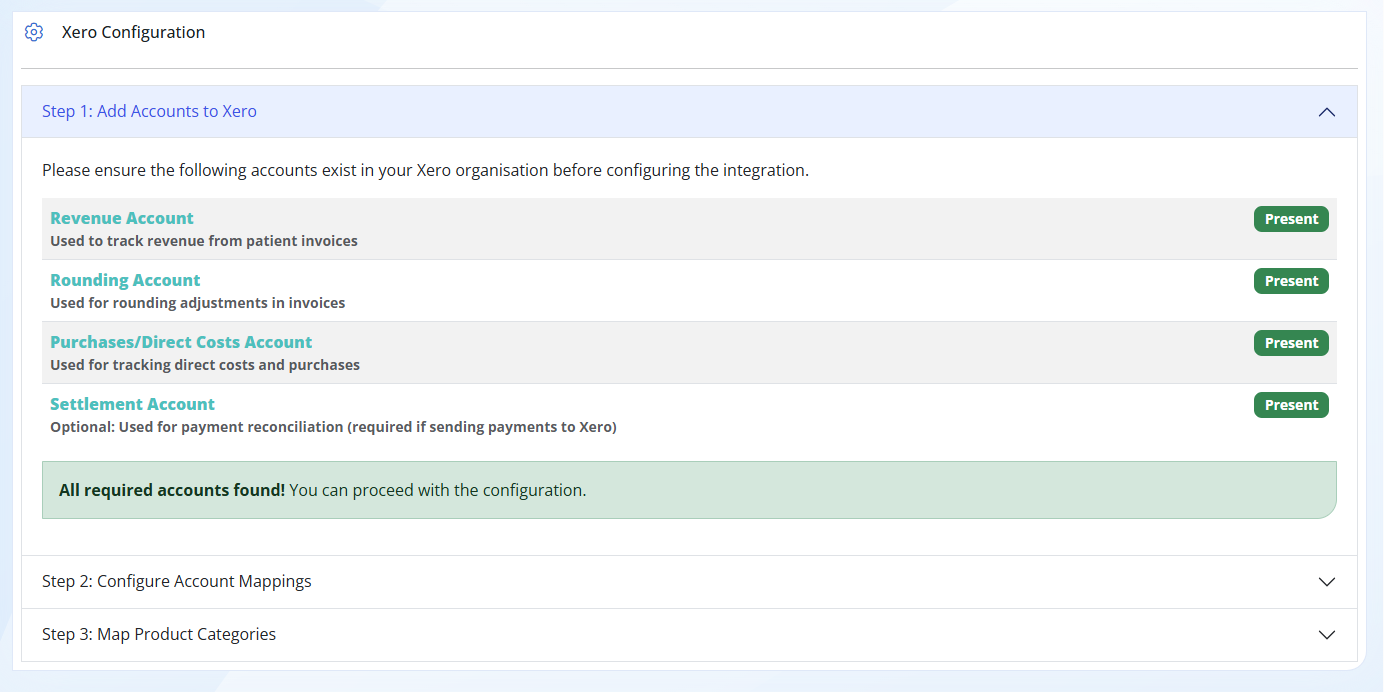
Step 2: Make sure the required Accounts below are Set Up in Xero for SimpleClinic to link to:
Revenue account: unless overridden by a product category mapping setup in Step 3 a revenue account is needed to create new invoices.
Rounding account: if we need to allow for rounding (most often due to discounts) this is the account rounding will be coded to. Amounts in your rounding account should be very small.
Purchases account: orders you create in SimpleClinic will be coded to this account by default.
Settlement account: a settlement account is optional and only needed if you will be using a clearing account to automatically pay invoices in Xero.
Step 3: Configure Account Mappings you will be able to match the accounts we need to the relevant accounts in Xero. Each of the required accounts will give you an option to choose a matching account from Xero.
All options will require a mapping. We will hint which options match by filtering the select box to show only the relevant accounts.
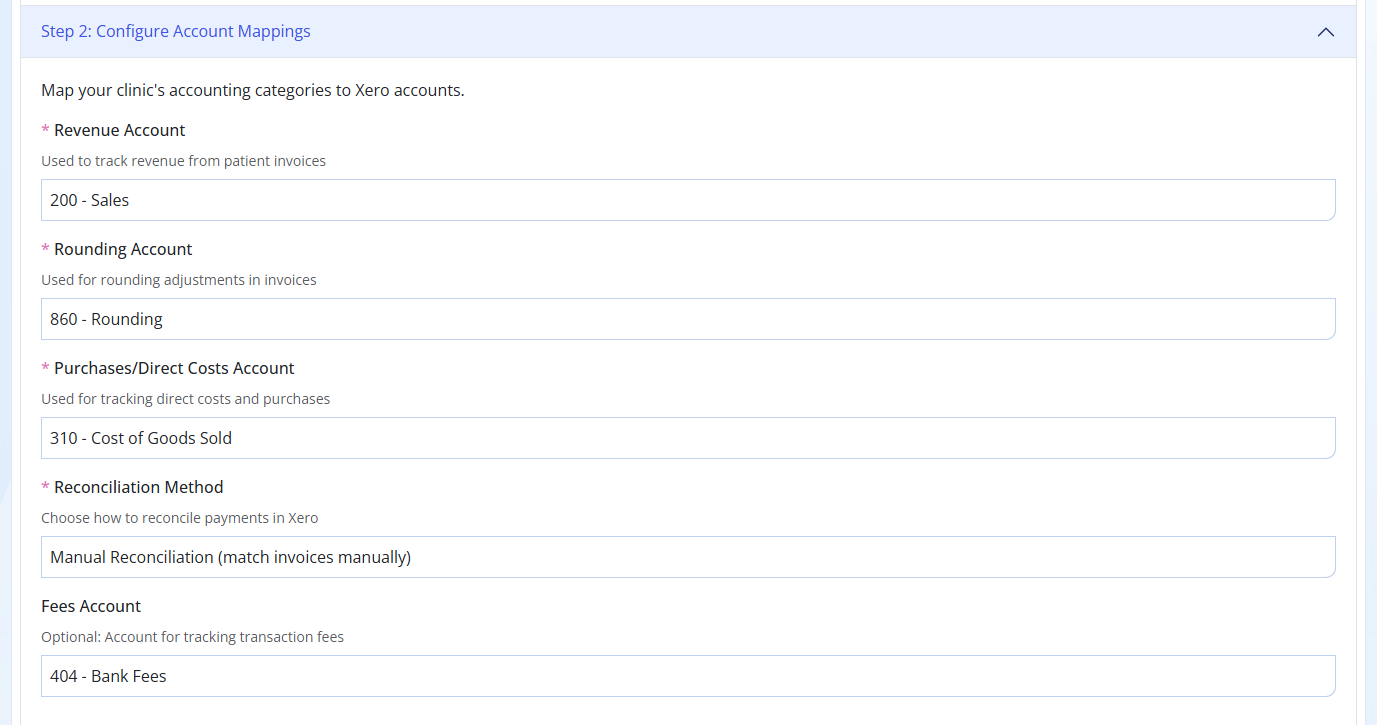
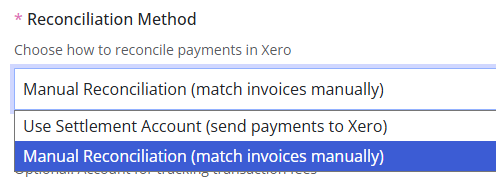
Step 4. Set your Bank reconciliation method. This will either be through a Clearing Account or through Matching Invoices. Talk to your book keeper or accountant to see which they prefer. The option for Clearing Account is disabled if no Settlement Account was detected.
If using a Settlement account refer to this article for more information.
If matching invoices with your bank feed refer to this article.
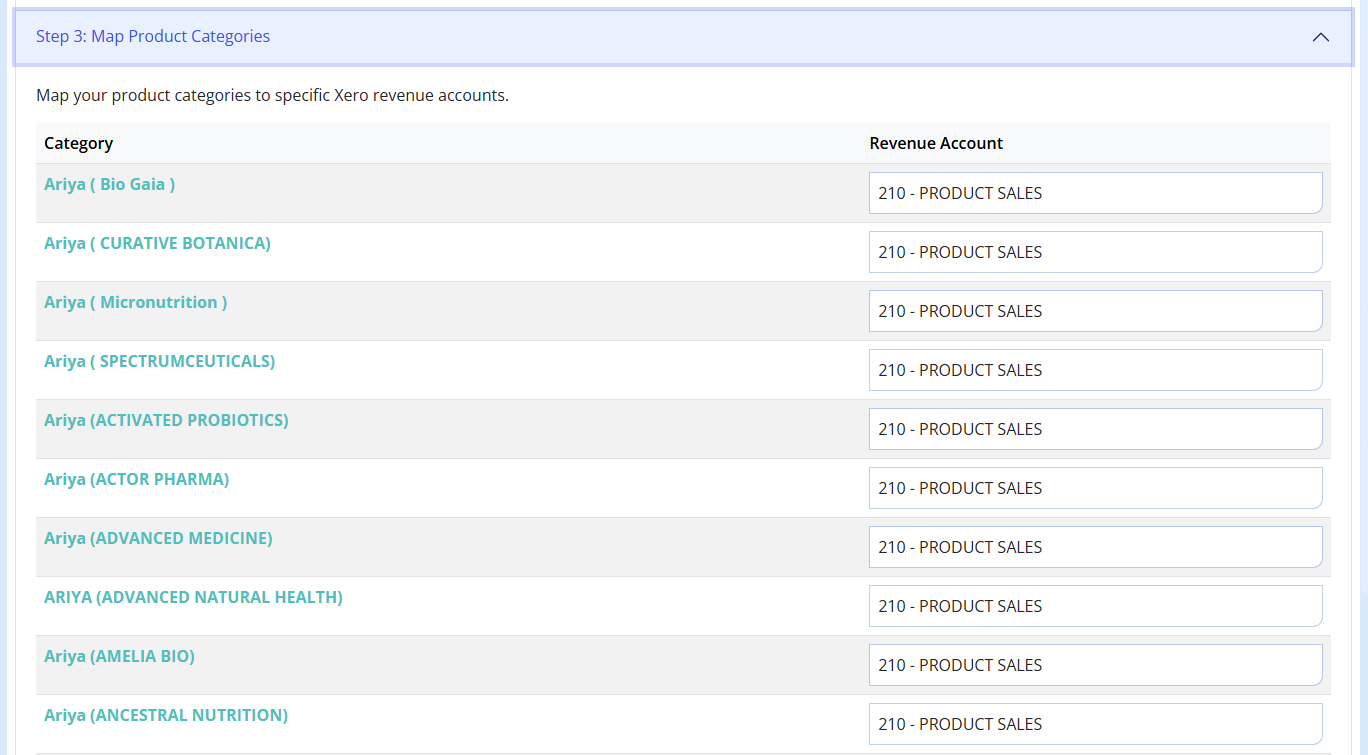
Step 5: Map Product Categories to Specific Revenue Accounts - NOTE this step is optional.
Your default mapping under Step 2: Configure Account Mappings, has already linked your income to a revenue account.
However you can choose to override the default mapping setup and have different inventory categories linked to different revenue accounts.
For example, you may have a revenue account in Xero for Products sales, and a separate one for Consultation income.
View this article for more information on how to assign categories to inventory items.