
In this article we will cover connecting your SimpleClinic account to your Xero account. This requires a Xero Grow or Comprehensive plan as a minimum. A Xero Ignite Plan will not be supported.
If you have not yet signed up for Xero you can do this from here: https://www.xero.com/au/pricing-plans/
On this page:
- Important Information
- Helpful Links
- Connecting Xero
- How the Xero integration works
- Automatic Syncing
- How invoices sync to Xero
- Xero reporting
- Hiding and unhiding invoices
Important Information
- It is not recommended to connect both your payment gateway (Stripe or Square) and SimpleClinic to Xero (your bank feed must be connected to Xero) otherwise you will have a duplication of records in Xero.
Helpful Links
- Connect and Configure your Xero Integration
- Reconciling in Xero using a Settlement Account
- Reconcile in Xero by matching invoices
Connecting Xero
Refer to the following article to first connect and configure your Xero integration.
- Step 1: Authenticate with Xero
- Step 2: Configuring your Account Mappings
- Step 3: Optionally Configure Additional Revenue Accounts
How the Xero Integration Works
Once the integration has been configured, SimpleClinic will automatically sync invoices and orders to Xero.
The following records are created when information is synced from SimpleClinic:
| SimpleClinic Record Type | Xero Record Type |
| Patient | Contact |
| Invoice | Invoice (Accounts Receivable) |
| Supplier | Contact |
| Order | Invoice (Accounts Payable) |
Automatic Syncing
- When an invoice or order is created or modified in SimpleClinic, it is automatically queued for syncing.
- SimpleClinic sends the information to Xero approximately every 5–10 minutes.
- No manual action is required for invoices and orders to sync.
- Supplier details and orders will automatically synced from the order screen.
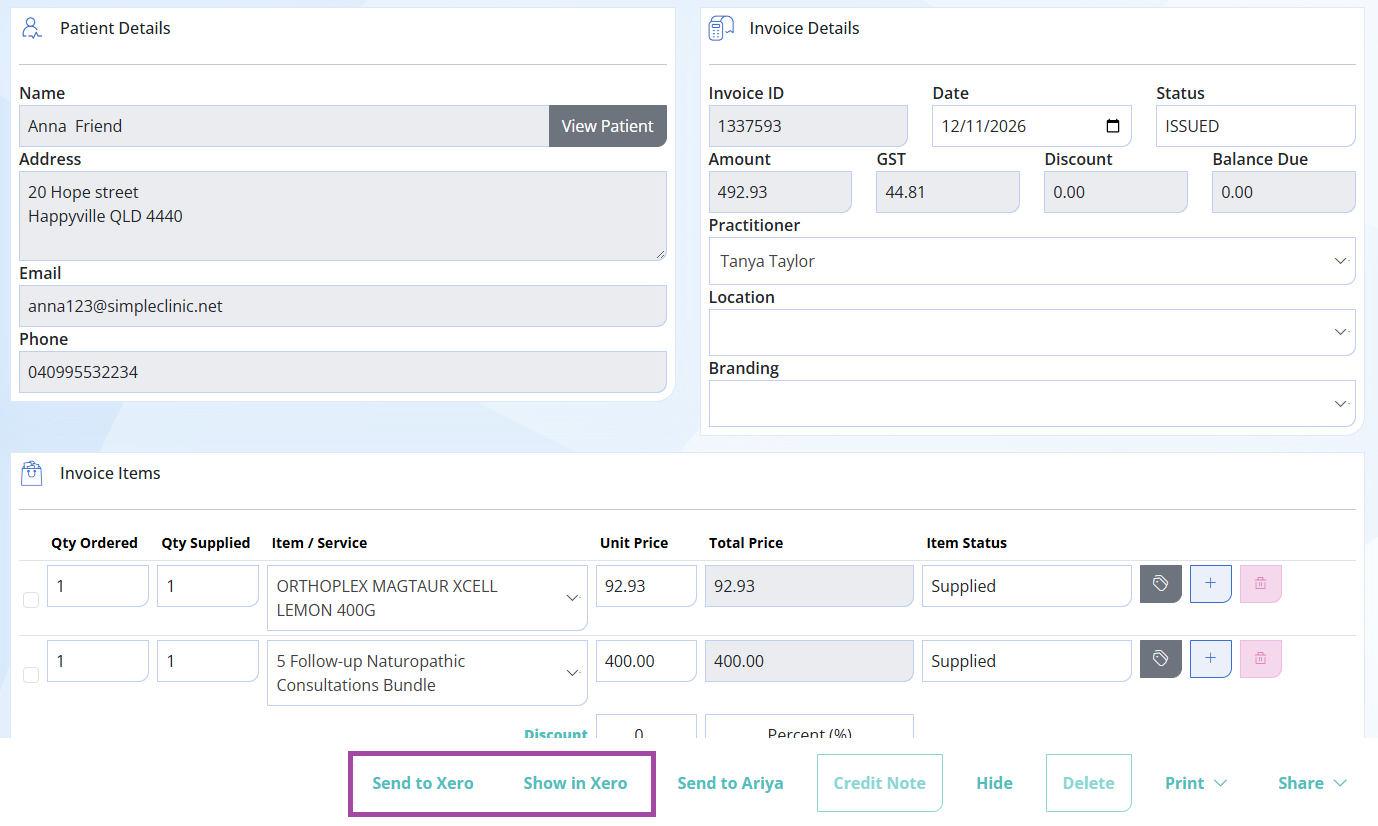
Your SimpleClinic invoice will have the relevant buttons:
Send to Xero - Manually push an invoice over to Xero. Note invoices will be sent across automatically each time an invoice has been updated. No updates will be sent to Xero once the invoice is paid in SimpleClinic.
Show in Xero - Click this button to be taken to the invoice in your Xero account.
How Invoices Sync to Xero
When an invoice is sent to Xero, SimpleClinic will:
Create a contact: If the patient does not already exist in Xero, a new contact will be created.
Create an invoice: An invoice will be created in Xero using the account mappings configured in SimpleClinic.
Await bank reconciliation: The payment will then be available for you to reconcile against your bank feed in Xero. Add a payment to the invoice created in Xero with the funds going to the nominated settlement account (unless you have chosen to match invoices) to await your bank reconciliation.
To reconcile your SimpleClinic invoices in Xero refer to the relevant article below:
For Matching invoices see here.
For a Settlement account see here.
Xero reporting
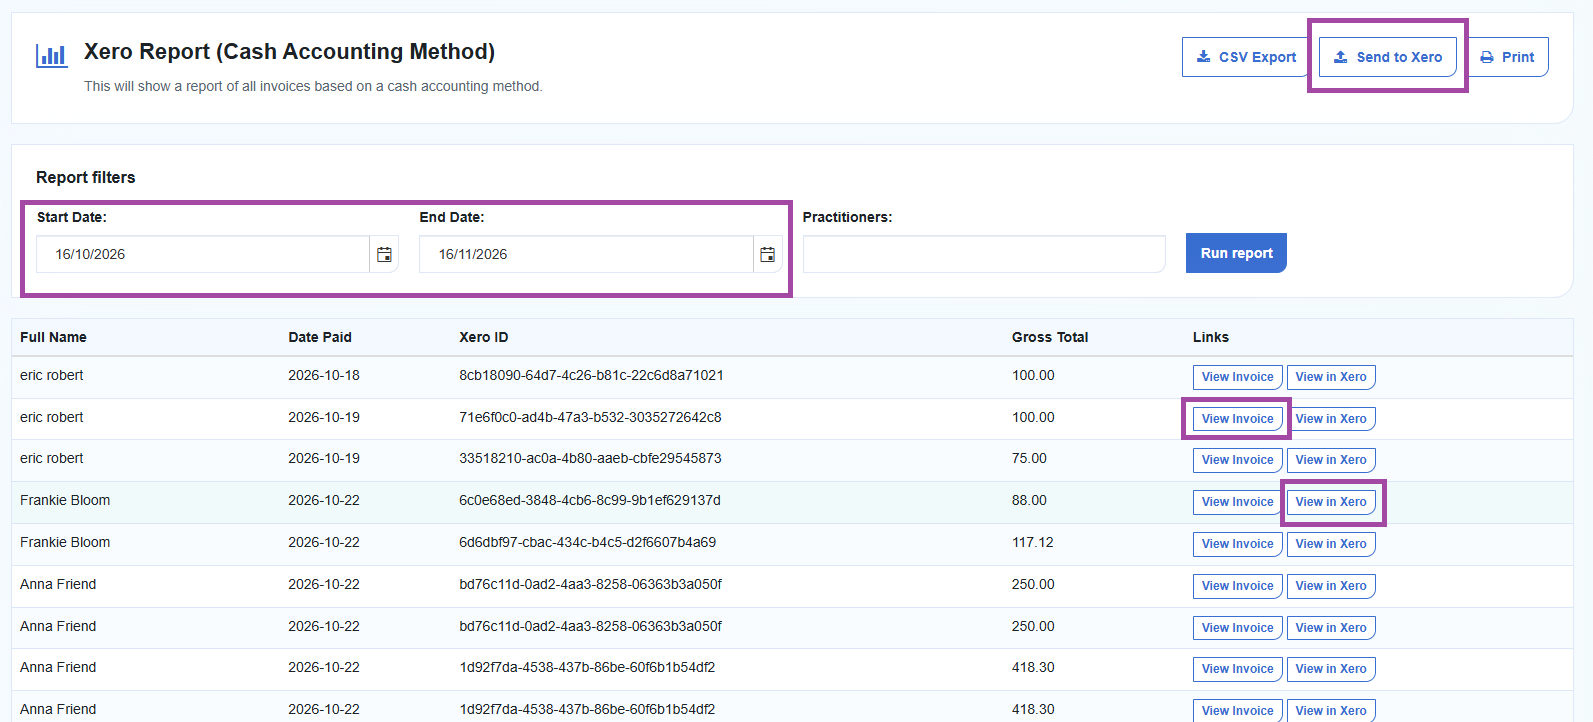
Access the Xero report under the Report Centre -> All Reports -> Sales Reports -> Xero Report.
Report features:
Start and End Date - filter for the date period you require.
Xero ID - Once an invoice has been sent to Xero the Xero Id will be displayed on the report. If there is a 0, the invoice has not been sent to Xero.
View Invoice button - Click to be taken directly to the invoice in SimpleClinic
View in Xero button - Click to be taken directly to the invoice in Xero
Send to Xero - Click the Send to Xero button to bulk send invoices without a Xero ID over to Xero
Important: Hiding and Unhiding Invoices
When you hide an invoice in SimpleClinic, the corresponding invoice in Xero will also be voided.
If you need to unhide an invoice, please be aware that this will not automatically unvoid the invoice in Xero.
If you need to restore the invoice in Xero:
- Log in to your Xero account.
- Locate the voided invoice.
- Manually update or restore the invoice as required.
The diagram below illustrates the Xero records created when information is synced from SimpleClinic.
