You can sell documents, ebooks or pdfs directly to your patients through SimpleClinic using a public URL link.
On this page:
- Important Information
- Helpful Links
- Create a Document for Sale
- Share your Document for Sale
- Patient Access to their purchased document
- Practitioner Notifications and Access to the Patients Purchased Document
Important Information
- You will need to create an Inventory Item first before setting up your document for sale. See the link below for these steps.
- File names should not contain any symbols, only characters or numbers.
- FILE LIMITS - There is a file size limit of 5Mb for a single file to be added to the Document Library.
- The following file types are supported for upload into SimpleClinic's Document Library:
- Microsoft Word - docx and doc file extensions (file preview not supported, document will be downloaded)
- Image file types - PNG, JPG (File preview available, will open in new tab)
- Adobe Acrobat - PDF (File preview available, will open in new tab)
Helpful Links
Create a Document for Sale
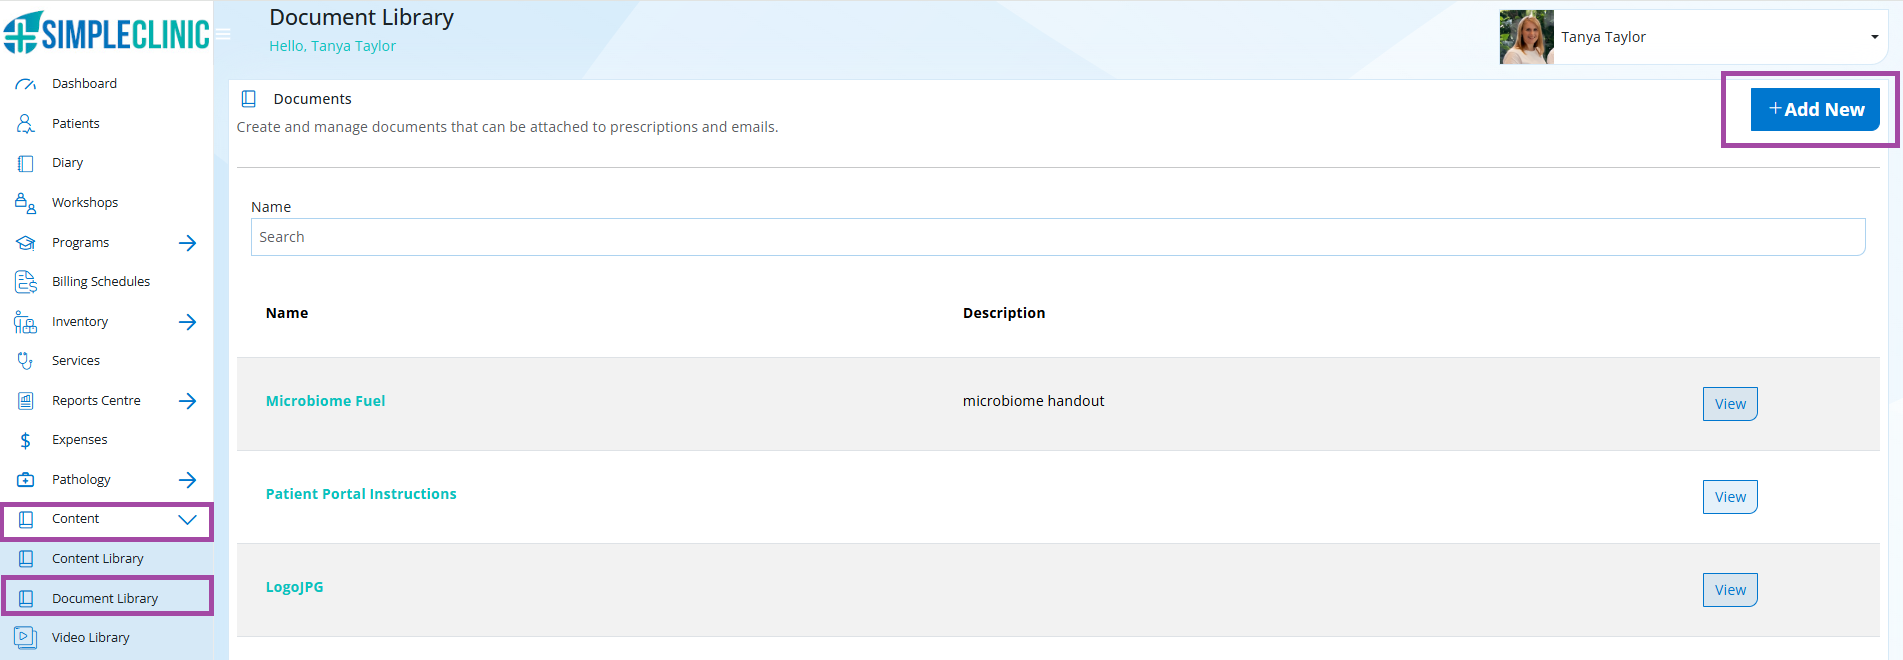
Step 1. To Add your new Document go to Content in the Main Menu -> Select Document Library -> Click +Add New in the Top right hand corner.
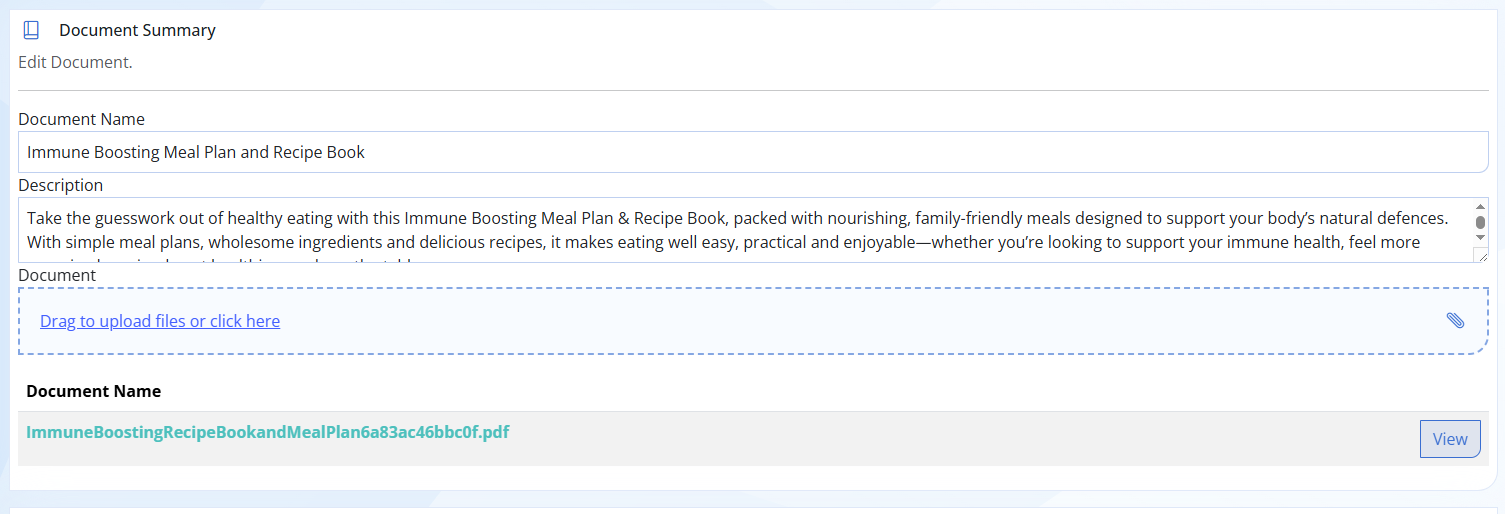
Step 2. Complete the following fields in the Document Summary:
Document Name: Provide your document a name o you can identify it in your document library
Description: Add a description of your Document. This will be displayed on the sales page and is visible to patients, so use this space to clearly explain what the Document includes, the benefits for the patient, and why they would find it valuable.
Document: Drag your file, or click to upload your document from your device. File names should not contain any symbols, only characters or numbers.
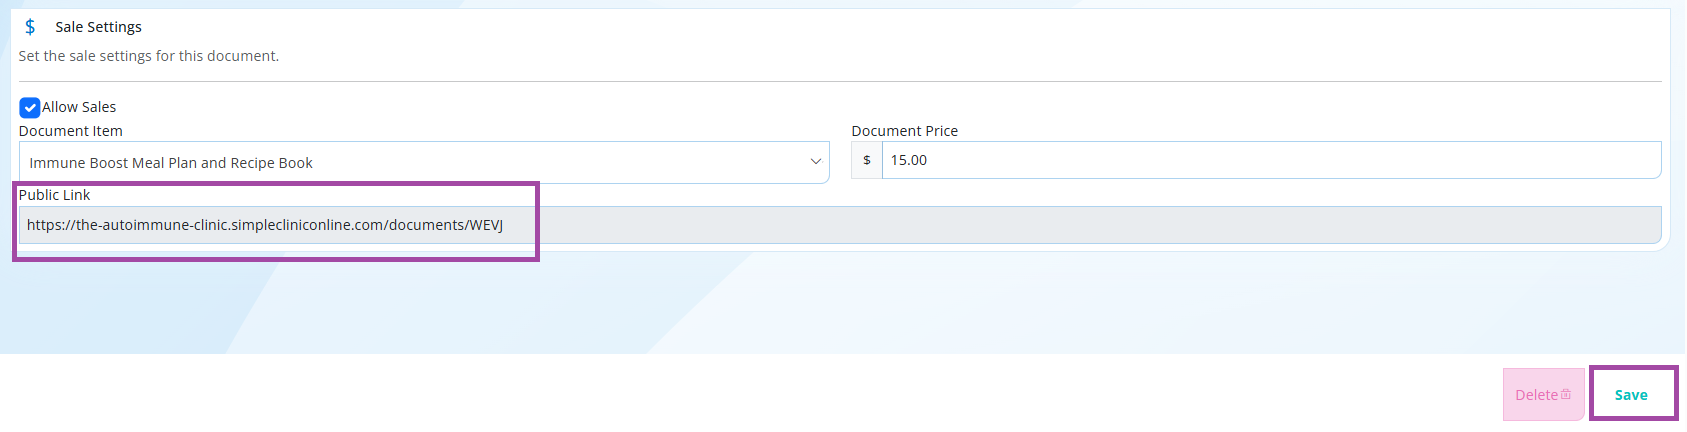
Step 3. Add your Sales Settings
Allow Sales: Tick Allow Sales if you would like to enable this document to sell online via the public link provided
Document Item: Select the Document Inventory Item for billing purposes. this should already be created under your Inventory Menu.
Document Price: Enter your document sell price
Public Link: Your Public Link will be created when you select SAVE in the bottom-right corner. Once created, you can share the public URL anywhere you promote your Document, including social media, a “Buy Now” button on your website, newsletters, and email blasts.
 Share your Document for sale
Step 4. Share your Public URL to promote and sell your Document
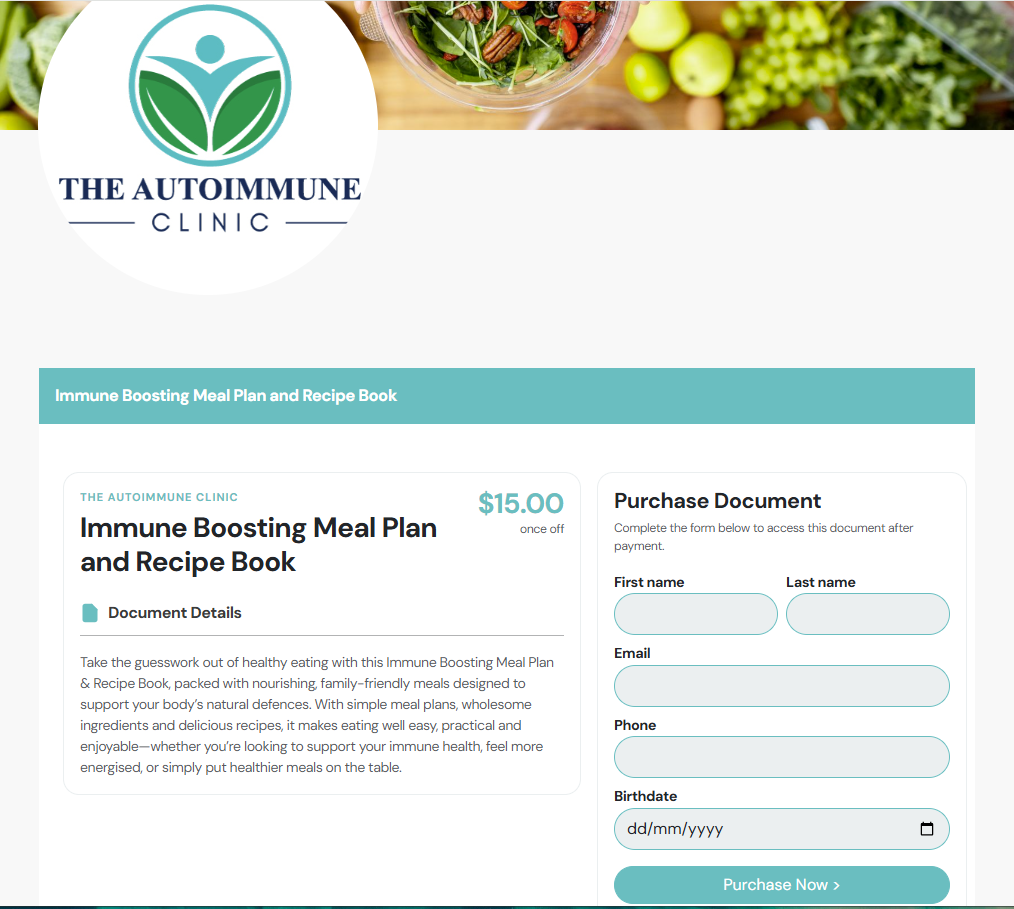
The Patient will be required to enter their First name, Last name, email, phone and birthdate --> then they select Purchase Now.
Patient Access to their purchased document
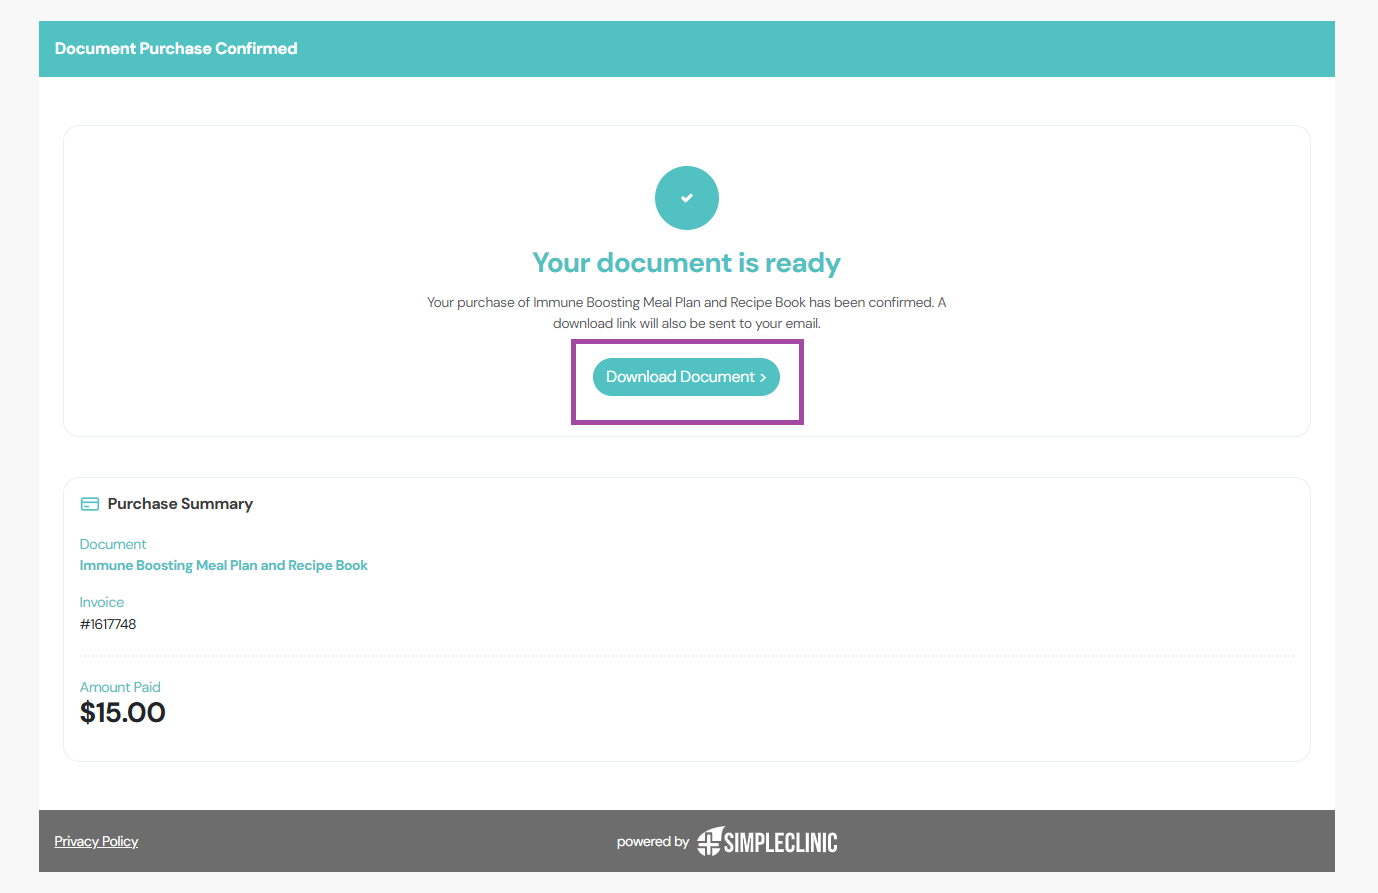
The Patient will immediately be provided a purchase confirmation on their screen with a button to 'Download Document'.
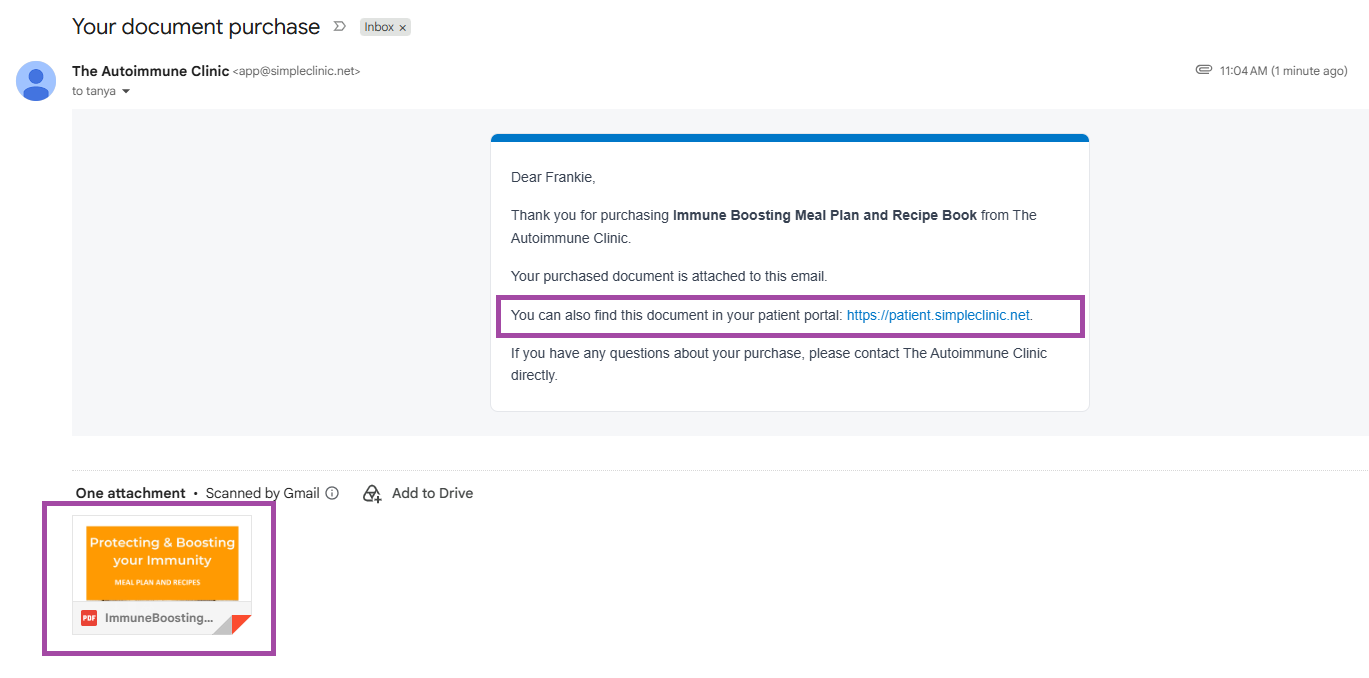
An email will also be sent to the patients provided email address titled 'Your Document Purchase' with a direct download attached and a link to access the Patient Portal where they can also access their document.
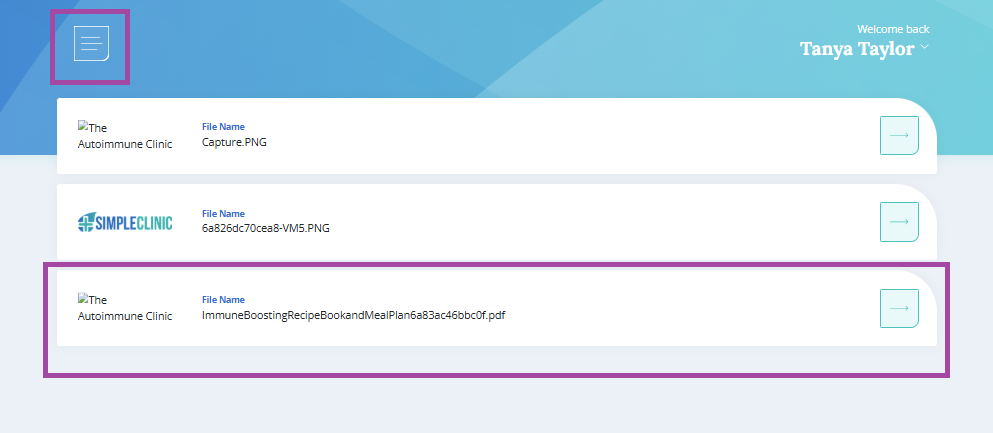
In the Patient Portal, the patient will find their document by going to the Main Menu button --> Select Files from the menu drop down.
Practitioner Notifications and Access to the Patients Purchased Document
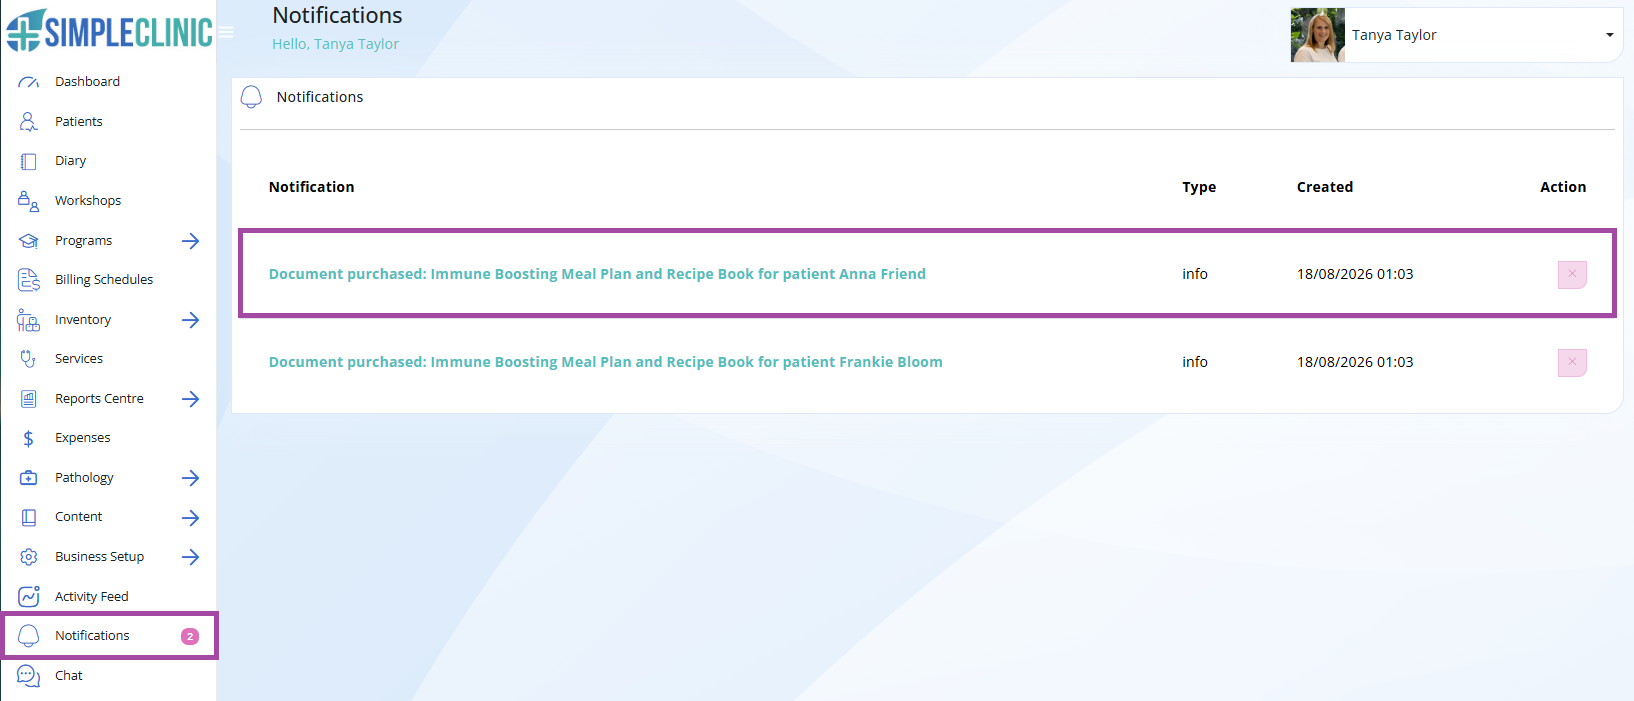
A Practitioner Notification will be visible under Notifications in the left hand Main Menu. Click the X to clear your notification.
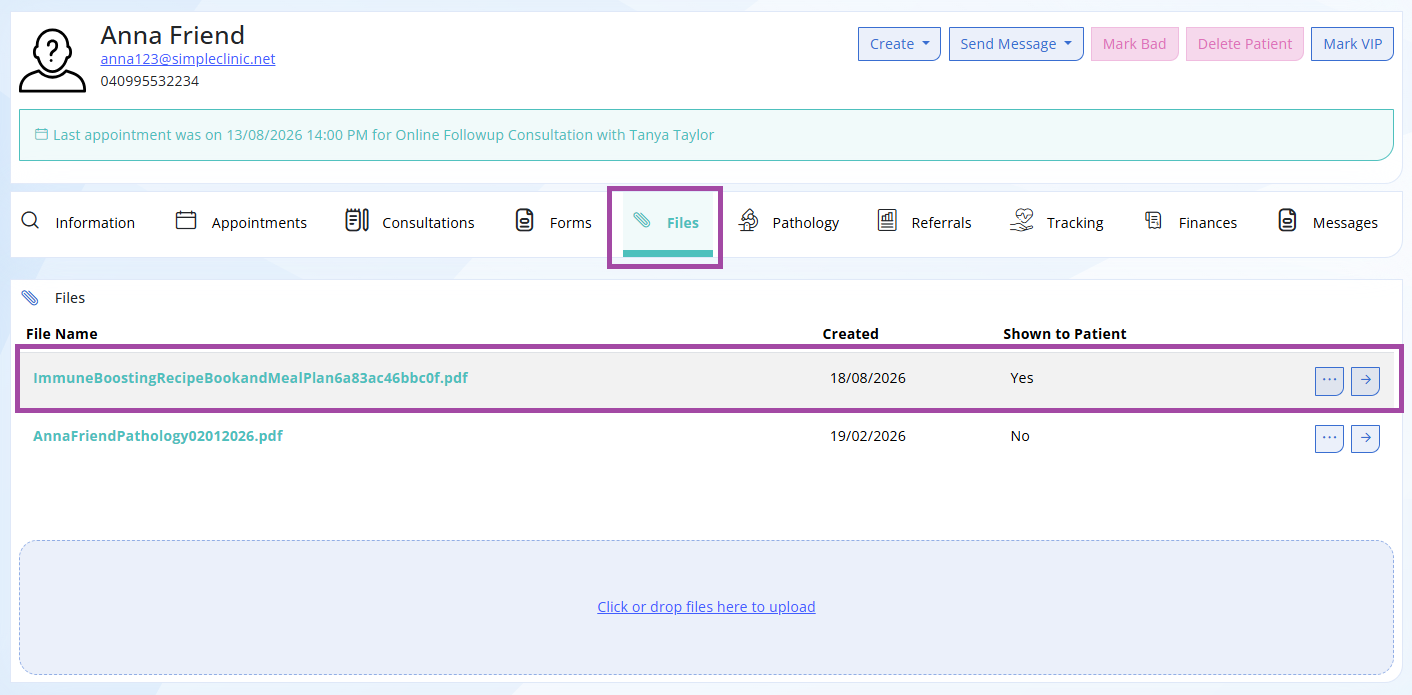
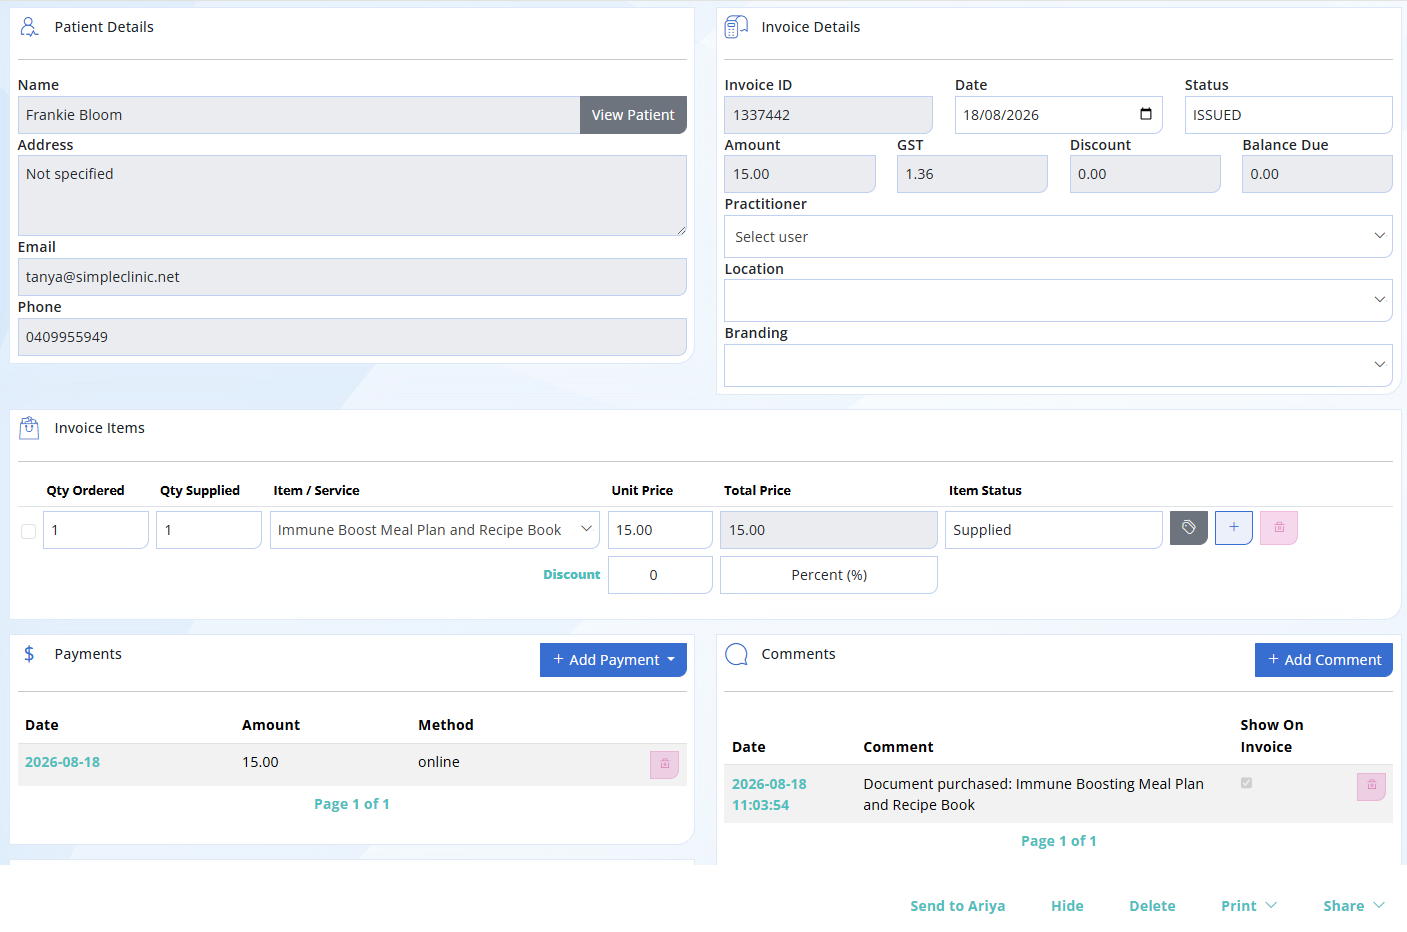
An invoice for the document sale can be found under the Patient Record --> Files Tab.
The Document can also be found under the Patient Record --> Files tab.