
To have Vitae Mosaic integration enabled on your account, you will need to access Business Setup -> Integrations -> Click to Connect under the Vitae Mosaic option to request access.
Please note: Vitae Mosaic integration is only available to Vitae Mosaic trained practitioners.
This article will explain how to:
- Create Timelines, Spectrums, Codas, Care Plans and Prescriptions
- View patient history
Step 1. Create a Timeline
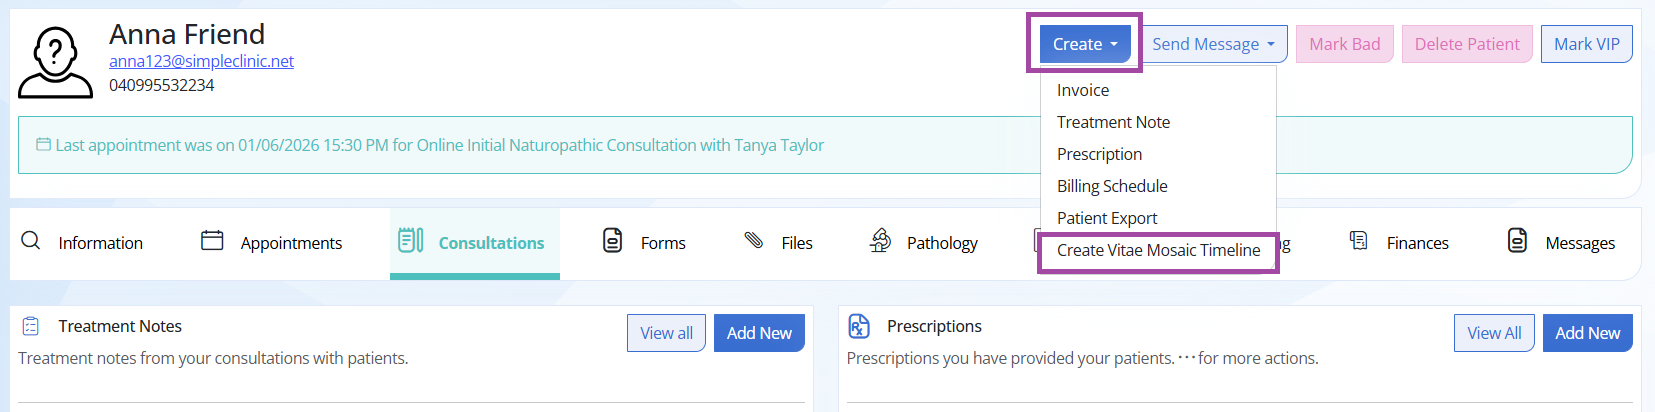
Open the Patient record from the left hand main menu -> Select a Patient Record -> from the action bar, click Create -> Create Vitae Mosaic Timeline
Step 2.
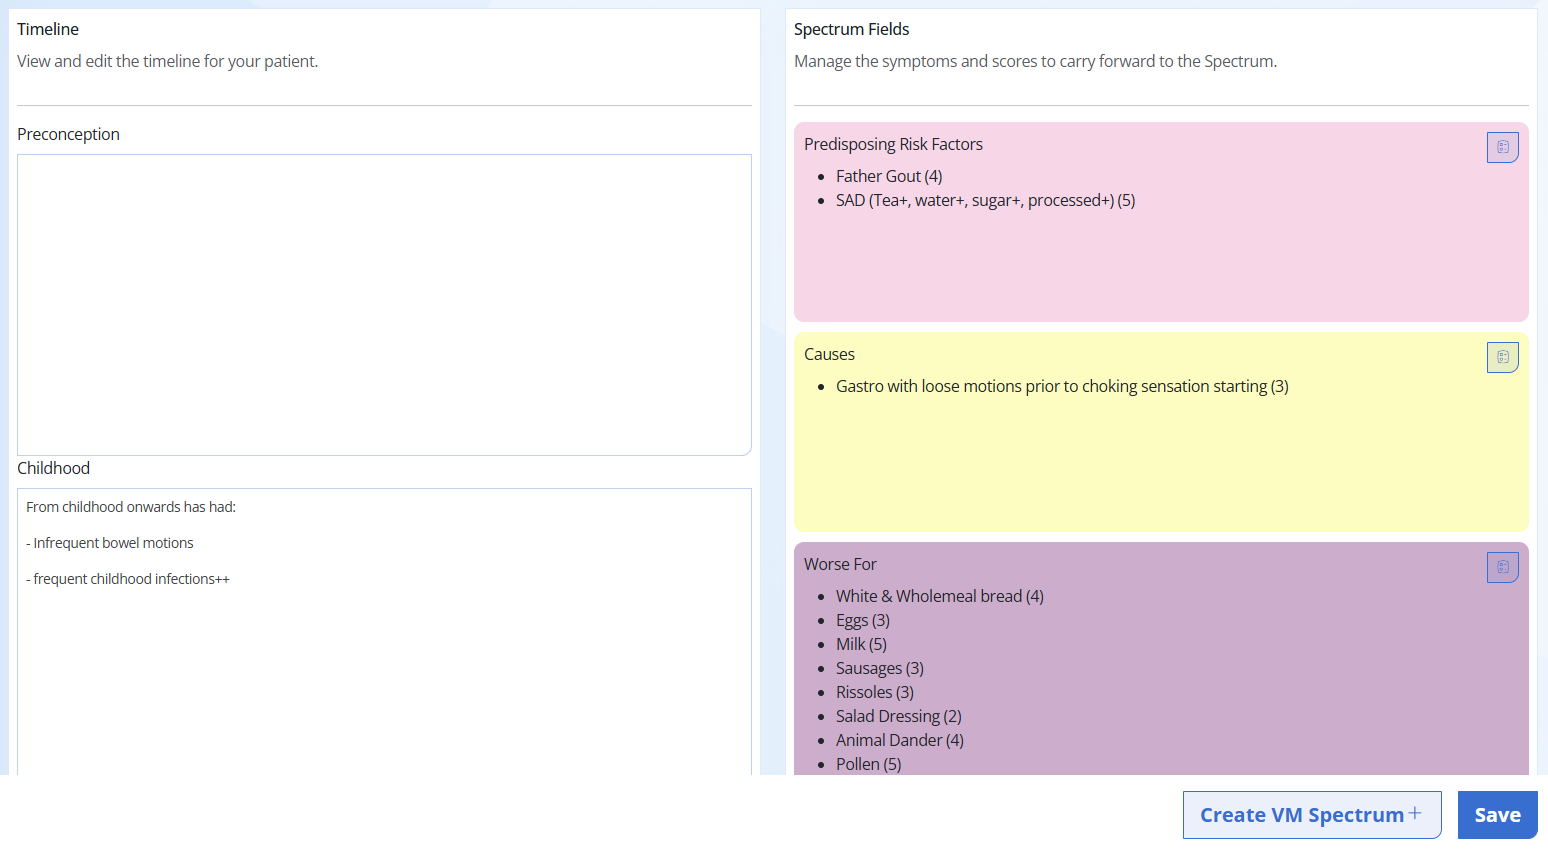
Within your timeline record your patients case history and symptoms as well as assigning scores to the symptoms. The default scores are the recommended ones from Vitae Mosaic, however these can be changed on a per patient basis. Once done -> click SAVE.
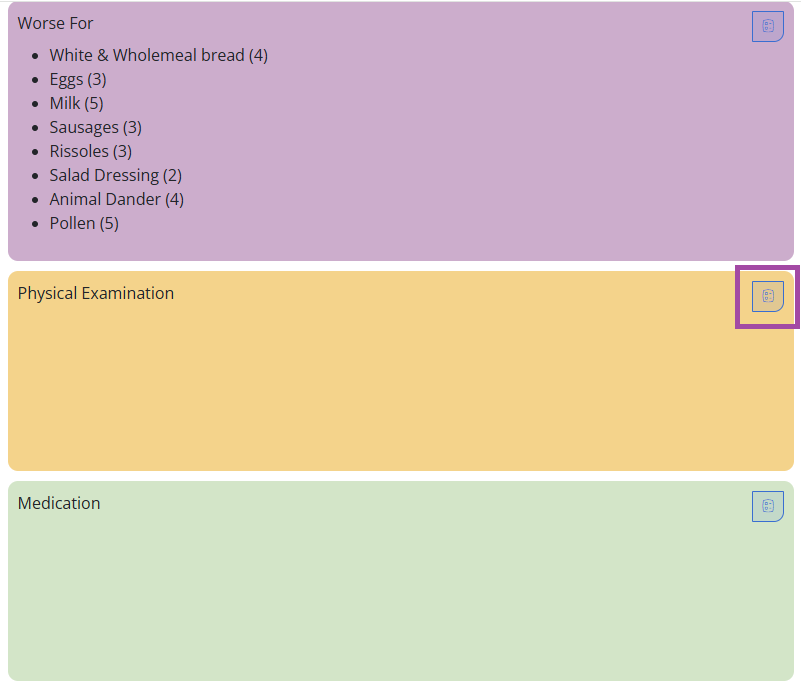
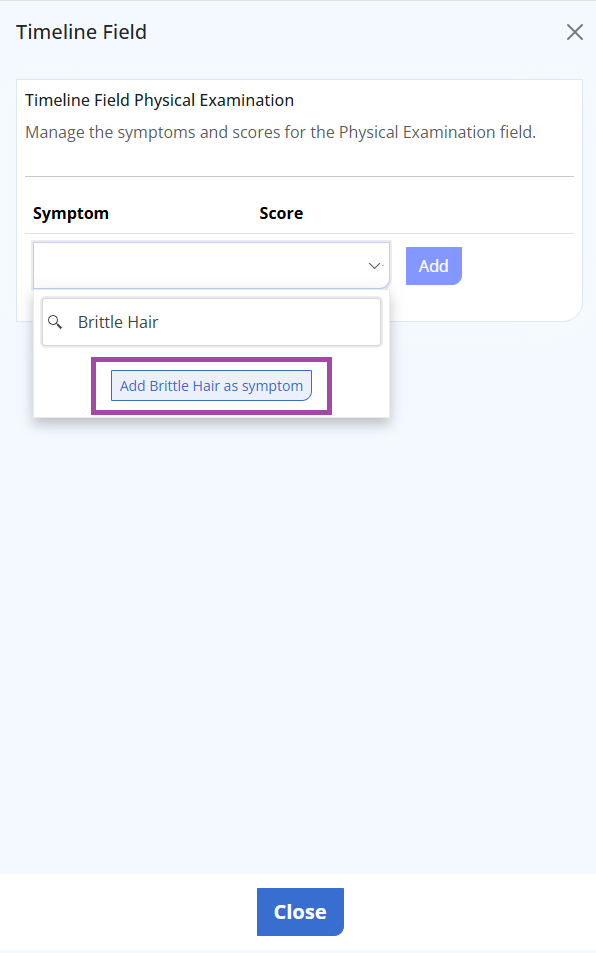
To add new symptoms to your VM TIMELINE, click on the clipboard icon in the top right hand corner of the section -> type your own symptom -> select 'Add XYZ as symptom' -> give it a score -> Close.
Step 4. - Create a VM Spectrum
Select Create Spectrum from the bottom right hand corner.
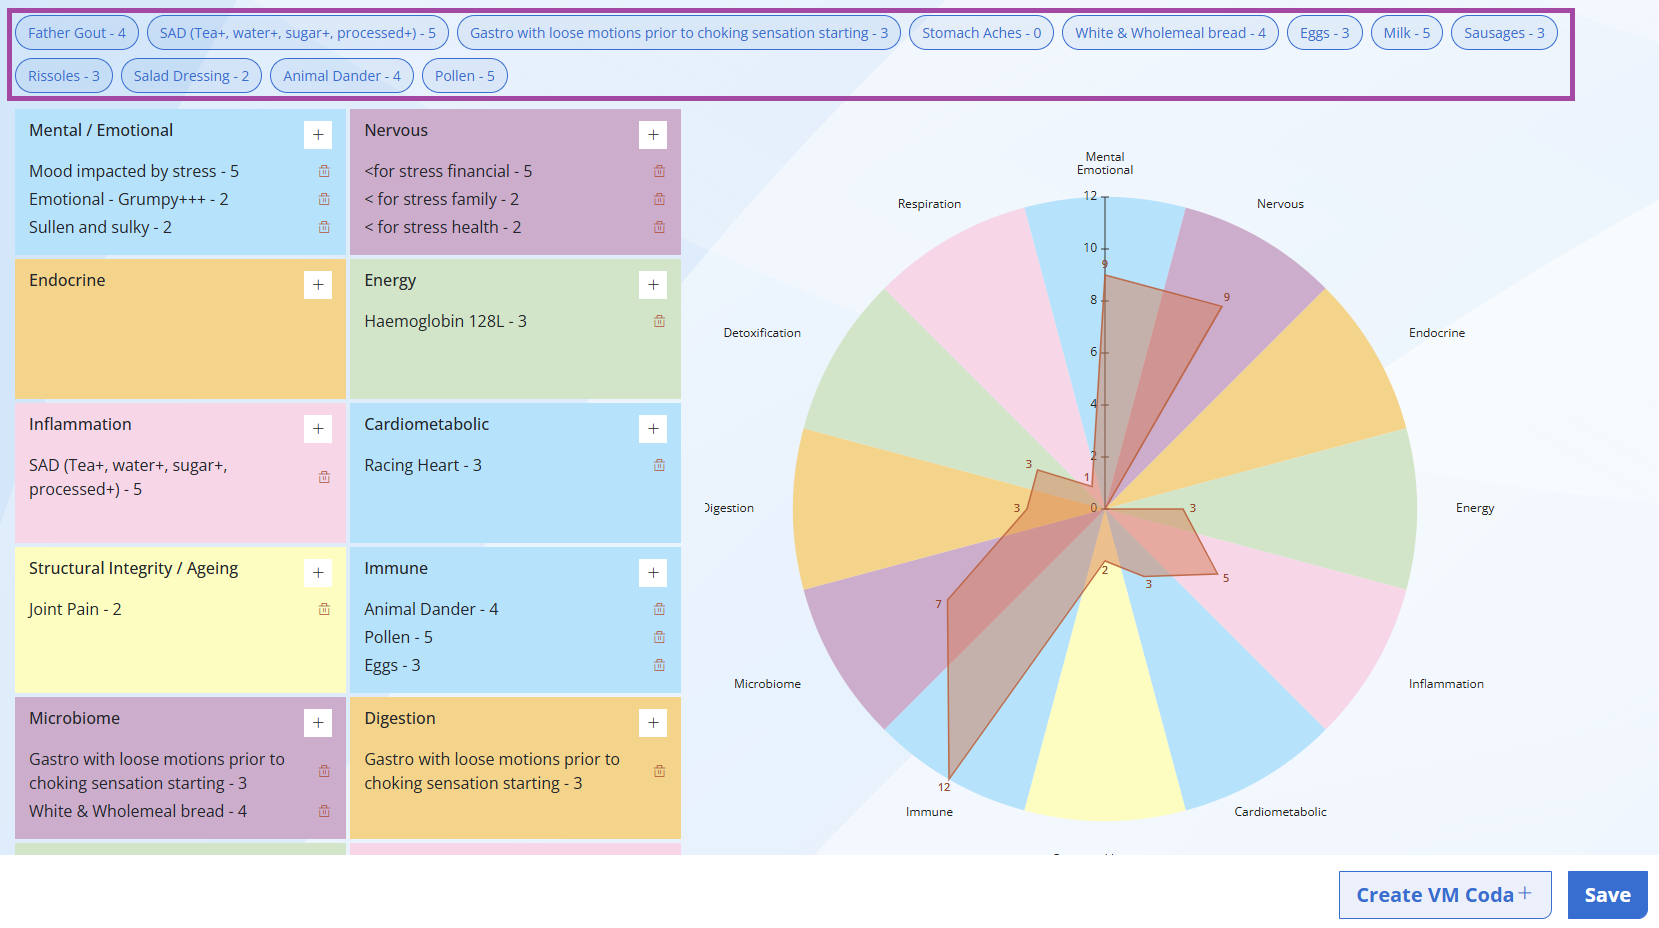
Click and drag the recorded symptoms to the timeline fields (see below). Symptoms can be dropped into as many timeline fields as required.
Enter any extra symptoms you into the relevant fields by selecting the + button in the top right hand corner of the system field. The more symptoms you record the more accurately reflected the Spectrum will look.
Click -> SAVE
The points on the wheel diagram above indicate the total score for each category. The numbers 0 - 16 in the above example are a guide to identify these scores for each category.
For example, the highest score rating was 12 from the Immune segment, so the point is right at the edge of the segment. The Immune segment point indicates the total score of 12 and the Energy point indicates the total score of 3.
Step 5. - Create a VM Coda
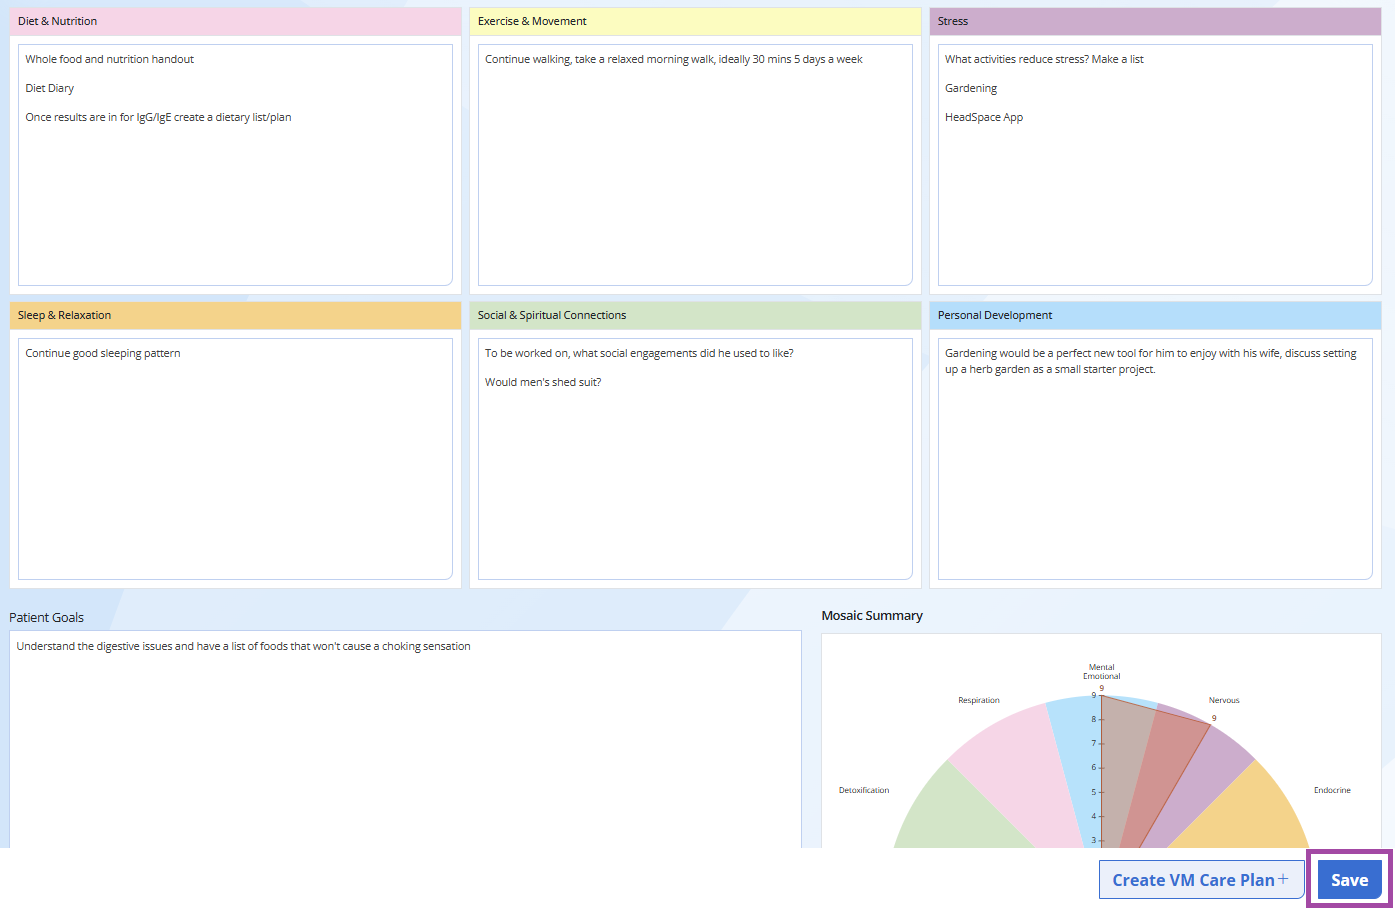
Select Create VM Coda from the bottom right hand corner -> Complete the fields -> SAVE in the bottom right hand corner.
Step 6. Create a VM Care Plan
Select Create VM Care Plan + in the bottom right hand corner.
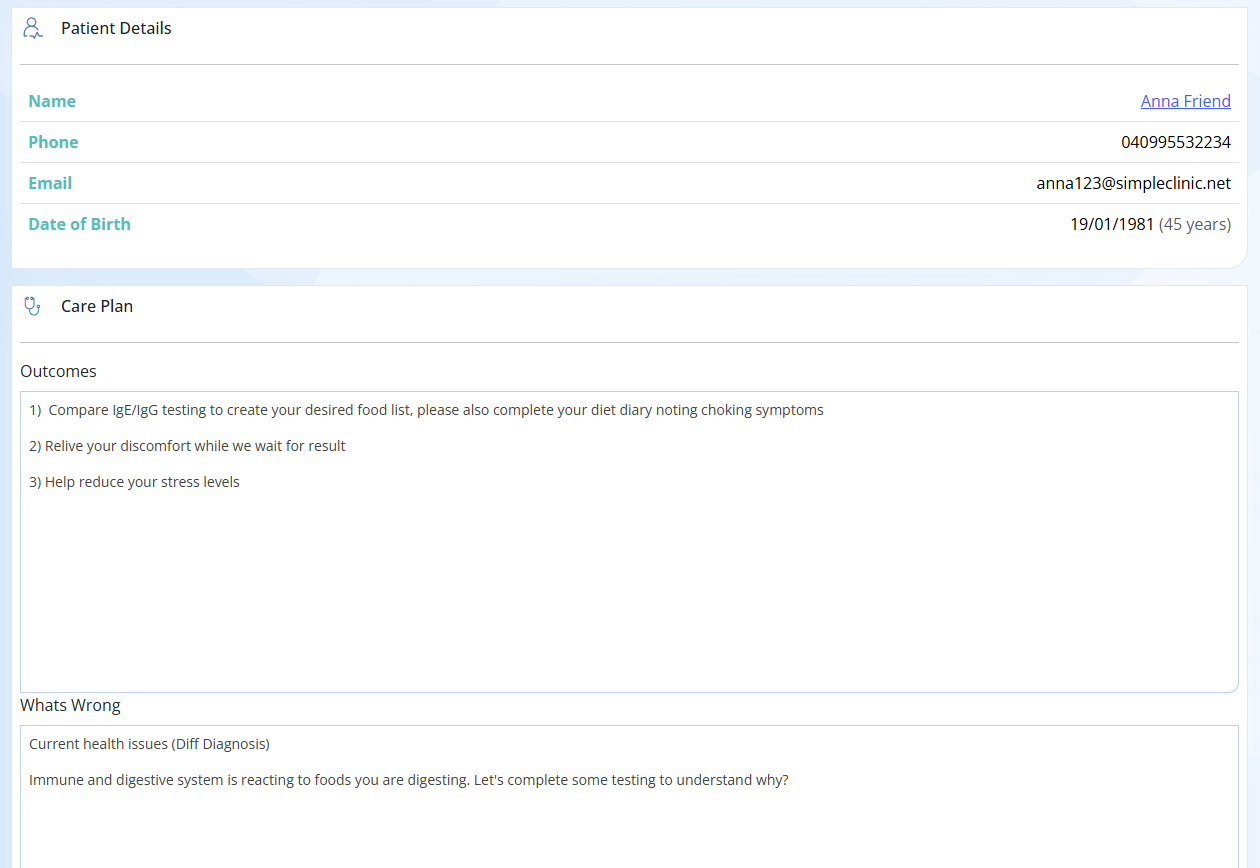
Once you have entered in your information, click SAVE.
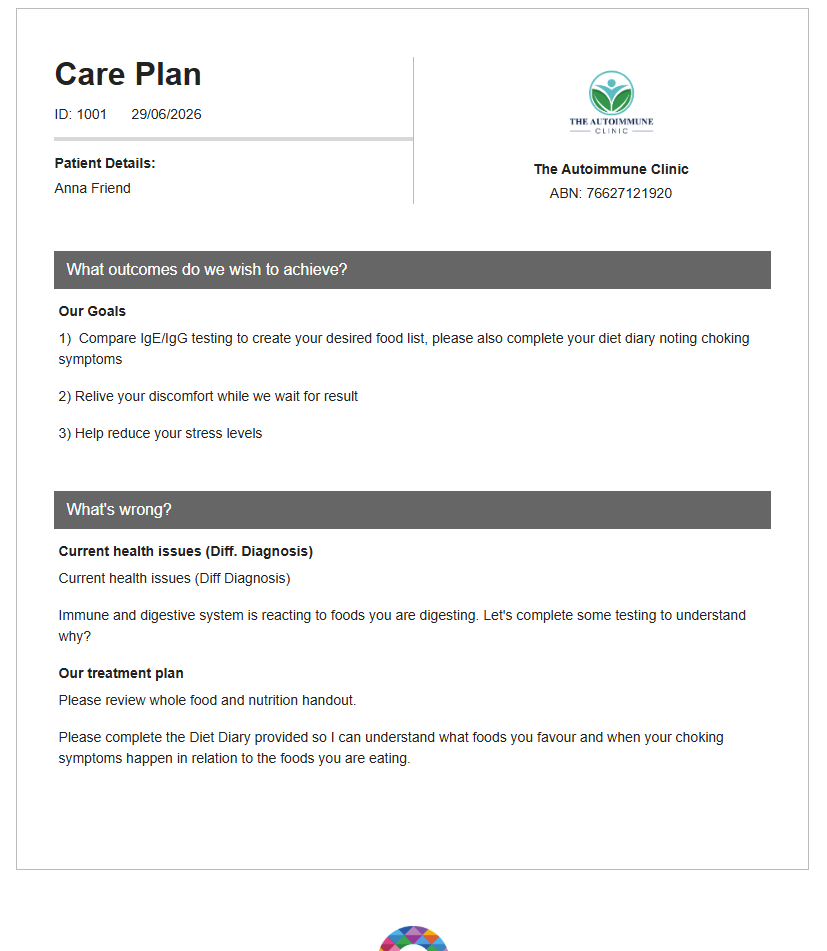
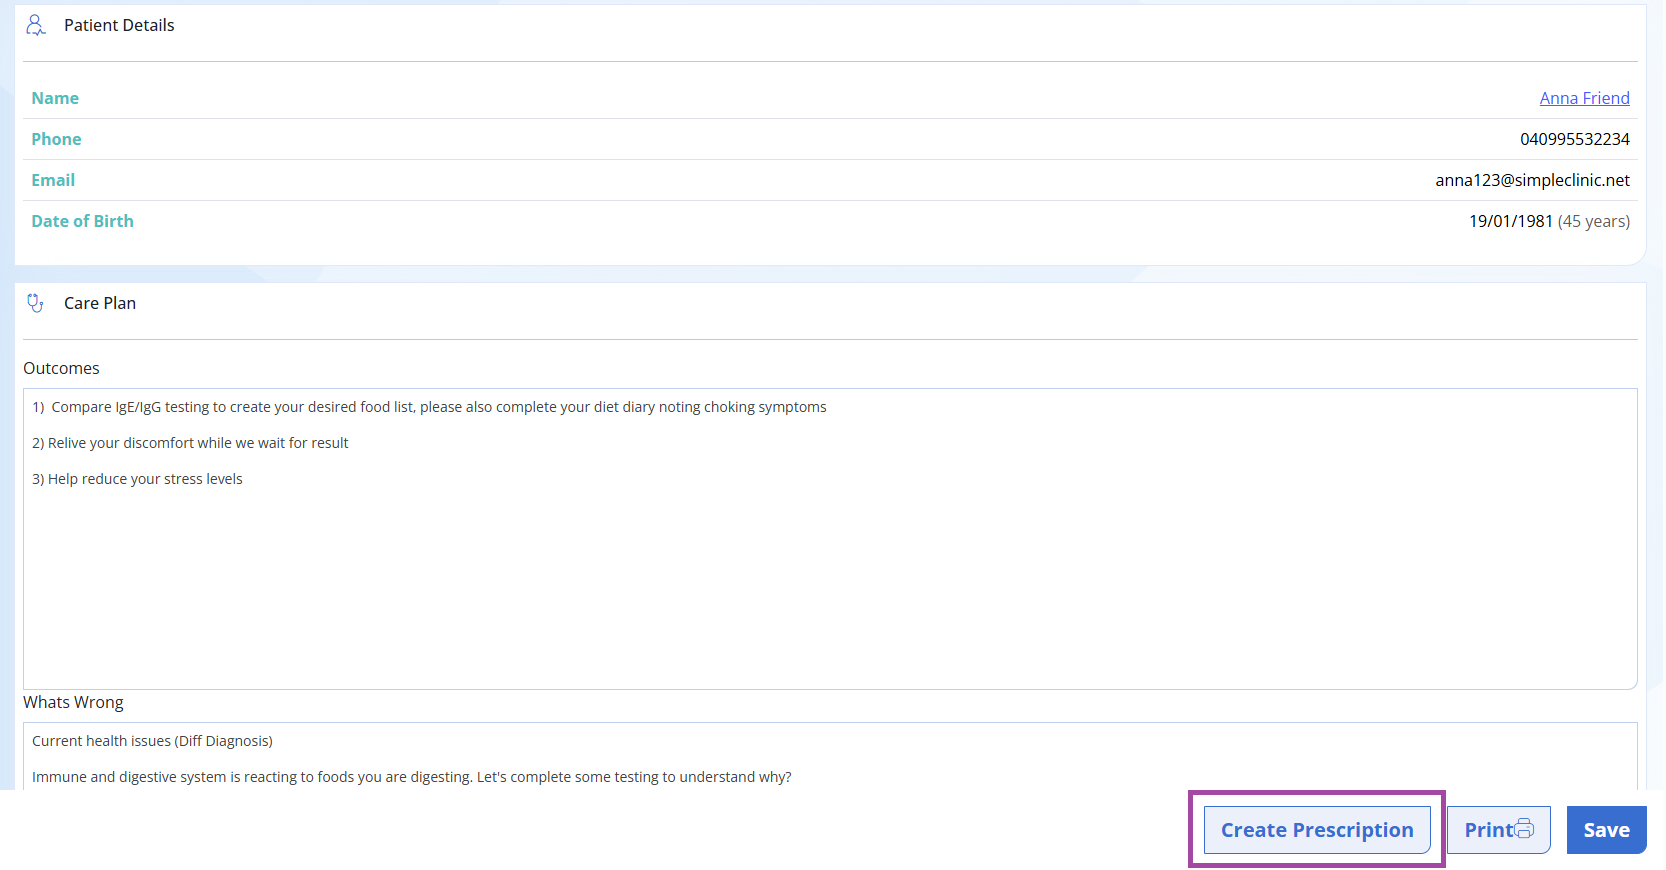
You can Print a copy of your patients care plan by selecting the Print button in the bottom right hand corner.
Step 7 - Create a SimpleClinic Prescription
To create a Prescription for your patient -> Select 'Create Prescription' from the bottom right hand of the page to open a blank SimpleClinic Prescription.
For more information on creating a prescription click here.
Viewing Treatment History
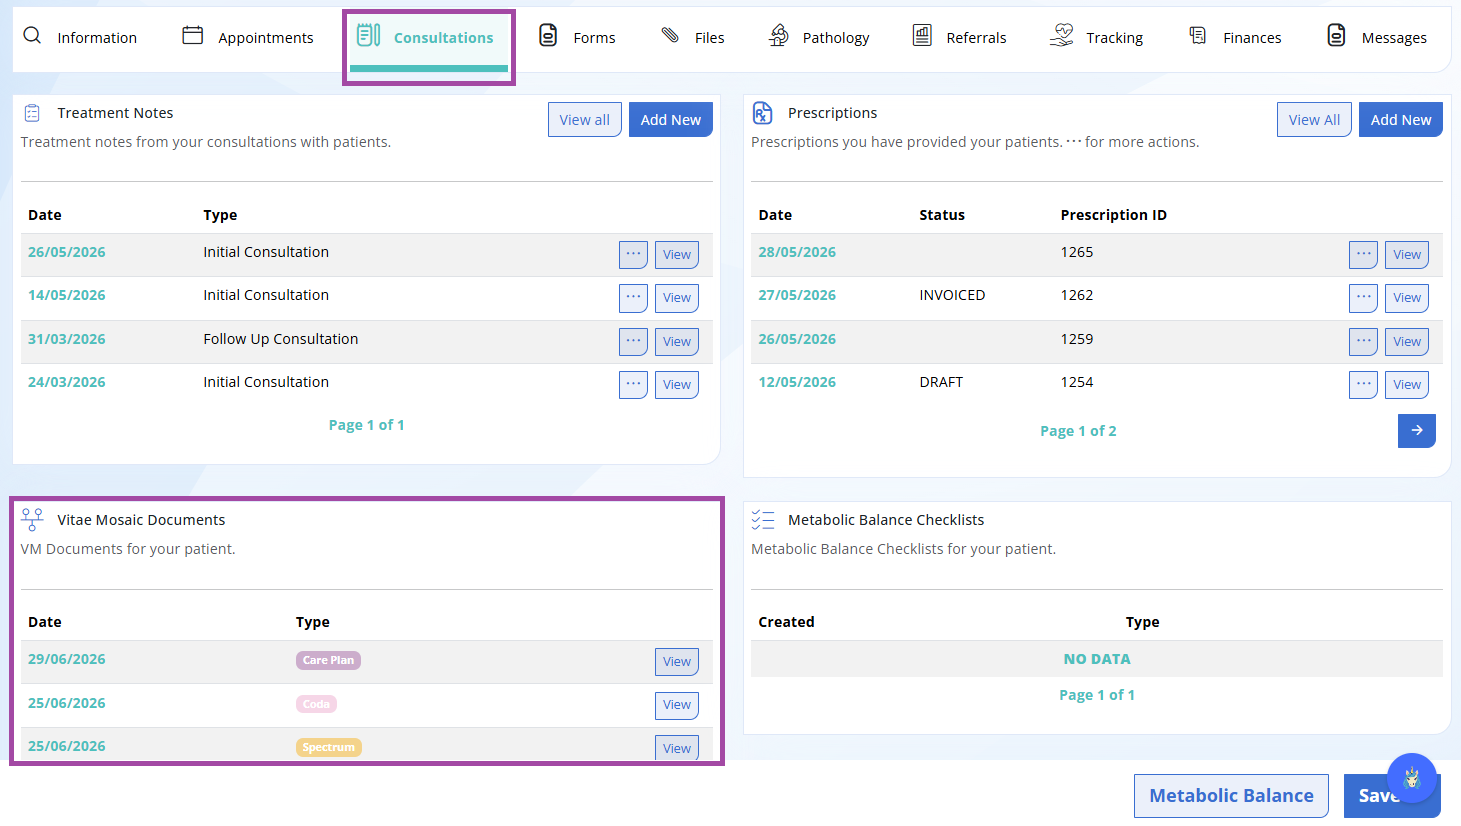
To view your patients Vitae Mosaic Documents go to the patient record --> Consultation tab --> Vitae Mosaic Documents --> View the relevant document.
You will be able to view your patient Timelines, Spectrums, Codas and Care Plans.
If you require any further support please feel free to raise a support ticket by emailing support@simpleclinic.net