SimpleClinic includes the ability to create and manage services and ongoing payments for these packages!
Packages are ideal for practitioners who are offering e.g a Weight Loss program that involves your client paying a weekly amount and receiving weekly consultations over a period of e.g 12 weeks. With a package it involves a reoccurring schedule of services. If you feel Packages may suit your use case better
Packages is developed with a very strict timeline of when the services can be redeemed. This is ideal for practitioners who might be offering a Weight Loss program that involves your client paying a weekly amount and receiving a weekly consultation.
If you want your clients to be able to redeem the services at ANY time, then Bundles will be better suited to your use. To learn more, click here.
PLEASE NOTE: Packages will only be enabled on your account if you have an Ezi-Debit account, for more information on Ezi-Debit please click here: Payment options for clients in SimpleClinic.
If you are having trouble saving package information, please check your EziDebit Public and Private Keys are correct. Disconnect, re-enter these keys and reconnect if needed.
Once you link your Ezi-Debit account to SimpleClinic, Packages will automatically be available.
1) Adding Credit Card Details
Your first step, will be to add credit card details to the patient file. You can do this by going to Patients -> Select a patient record -> Click the Payment Details section -> Click ADD -> Select the payment gateway as ezidebit -> Enter cardholder and card details -> Click save.
Once done, you can follow the steps below to create and assign a package to a client.
2) Creating a Package
Please bear in mind that Packages has been developed around the concept that you will be on a payment schedule with the patient such as weekly, fortnightly, monthly etc.
Access the Packages features by clicking on the Inventory -> Packages menu option.
The list of existing packages will appear.
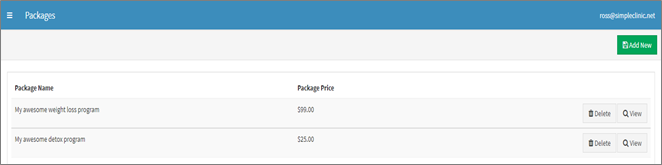
To create a new package, click on the Add New button on the top right of the screen.
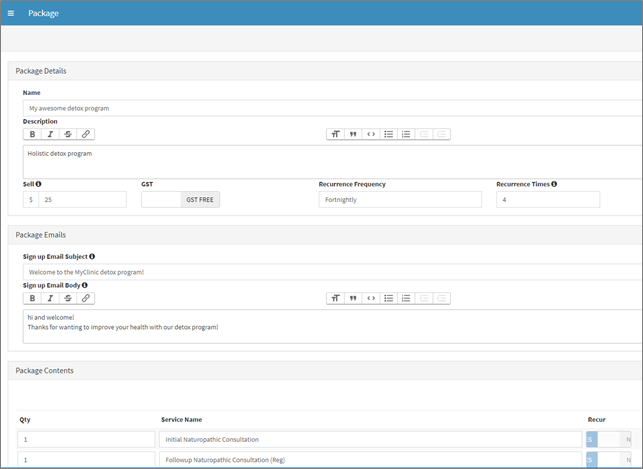
Fill in the package details, which includes the following:
· Name – Name of your package
· Description – a longer description of the package
· Sell price – cost for EACH billing cycle, not the total price of the package.
· GST - toggle whether GST is applicable to the package or not
· Recurrence Frequency – use the dropdown list to select whether the patient will be billed weekly, fortnightly, monthly, or other schedule
· Recurrence Times – the number of payments the patient will be charged for the package
· Sign up email subject – the subject line of the email which will be sent to the patient when they book into this package
· Sign up email body - the email text which will be sent to the client, you will need to include {{url}} in the body for the client to access their sign up paperwork
· Package contents – the list of services which are included in the package, their number and recurrence, if applicable.
The last section on the package details screen shows the patients who have signed up for the package.
3) Sample wording for sign up email body:
Hi {{client.first_name}},
I'm looking forward to giving you the support you need to achieve your health goals.
You can view your sign up docs by clicking here: {{url}}
Your package includes:
X
X
X
Regards,
PRAC NAME
Please note: The {{url}} is a MERGE tag, this will automatically populate with a unique link for the client to sign up. You don't need to obtain a link for anywhere else.
Ensure to click SAVE.
4) Assigning a Package to a Patient (ie, "subscribing" a patient to a package!)
Access the Packages features by clicking on the Inventory -> Packages menu option.
The list of packages appears. Click on the View button for the package a patient wishes to sign up to.

To sign up a patient to this package, click on the "Email sign up" button at the top of the packages window.
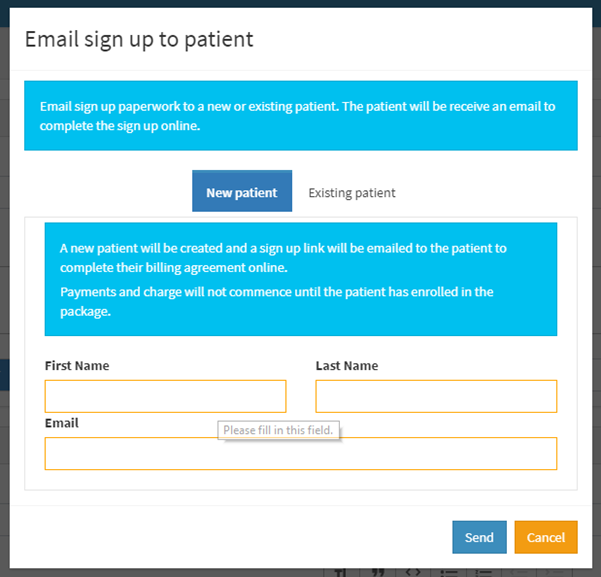
Click on the appropriate button for whether the patient is a new patient to your clinic, or an existing patient.
If a new patient, click on the "New patient" button and fill in the required name and email fields, and their details will be saved as a new patient. If they are an existing patient, click on the "Existing patient" button and type in at least 3 letters of their name, and select the correct name from the list which appears.
Click on the Send button. The invitation email for that package will be sent to the patient.

The patient will not be added to the list of subscribed patients, until they complete and submit their DDR (Direct Debit Request) form which was emailed to them in the steps above.
Alternatively, you can click on the "View sign up" button, which will display the electronic DDR form for the patient to fill in at the clinic! The patient can fill in their personal details directly into the form.

The payment amount, date and frequency details in the "Regular Debits" section on the fillable form are taken from the package cost and payment details. Check these payment details, and get the patient to check them too! If any of the payment details are incorrect, it could be that you changed them in the packages screen, but hadn't saved the changes first before opening the DDR form.
The patient should complete all sections of the DDR form, check the payment details, tick the Service Agreement checkbox, then click on the Submit button, to send the form to EziDebit.
A patient can subscribe to more than one package at the same time, and with different payment schedules!
5) Viewing Packages (ie Subscriptions) for a Patient
You can check the status of a patient and their subscribed packages in the Patients details screen. Select Patients from the main navigation menu, and search for and select their name in the list. In the patient details screen, click on the Payment Details tab.

If the patient has not completed an EziDebit DDR (Direct Debit Request) form, you can click on the Send to EziDebit button here.
If the patient has completed and submitted an EziDebit DDR form and been assigned to one or more packages or programs, you will see their payment details on this screen.

In the "Future Schedule" section of the screenshot above, using the 3 buttons on the right of each future payment, you have the ability to:
- By clicking on the "$" button - change the amount of that scheduled payment
- By clicking on the calendar button - change the date of that scheduled payment
- By clicking on the red trashcan button - delete that payment.